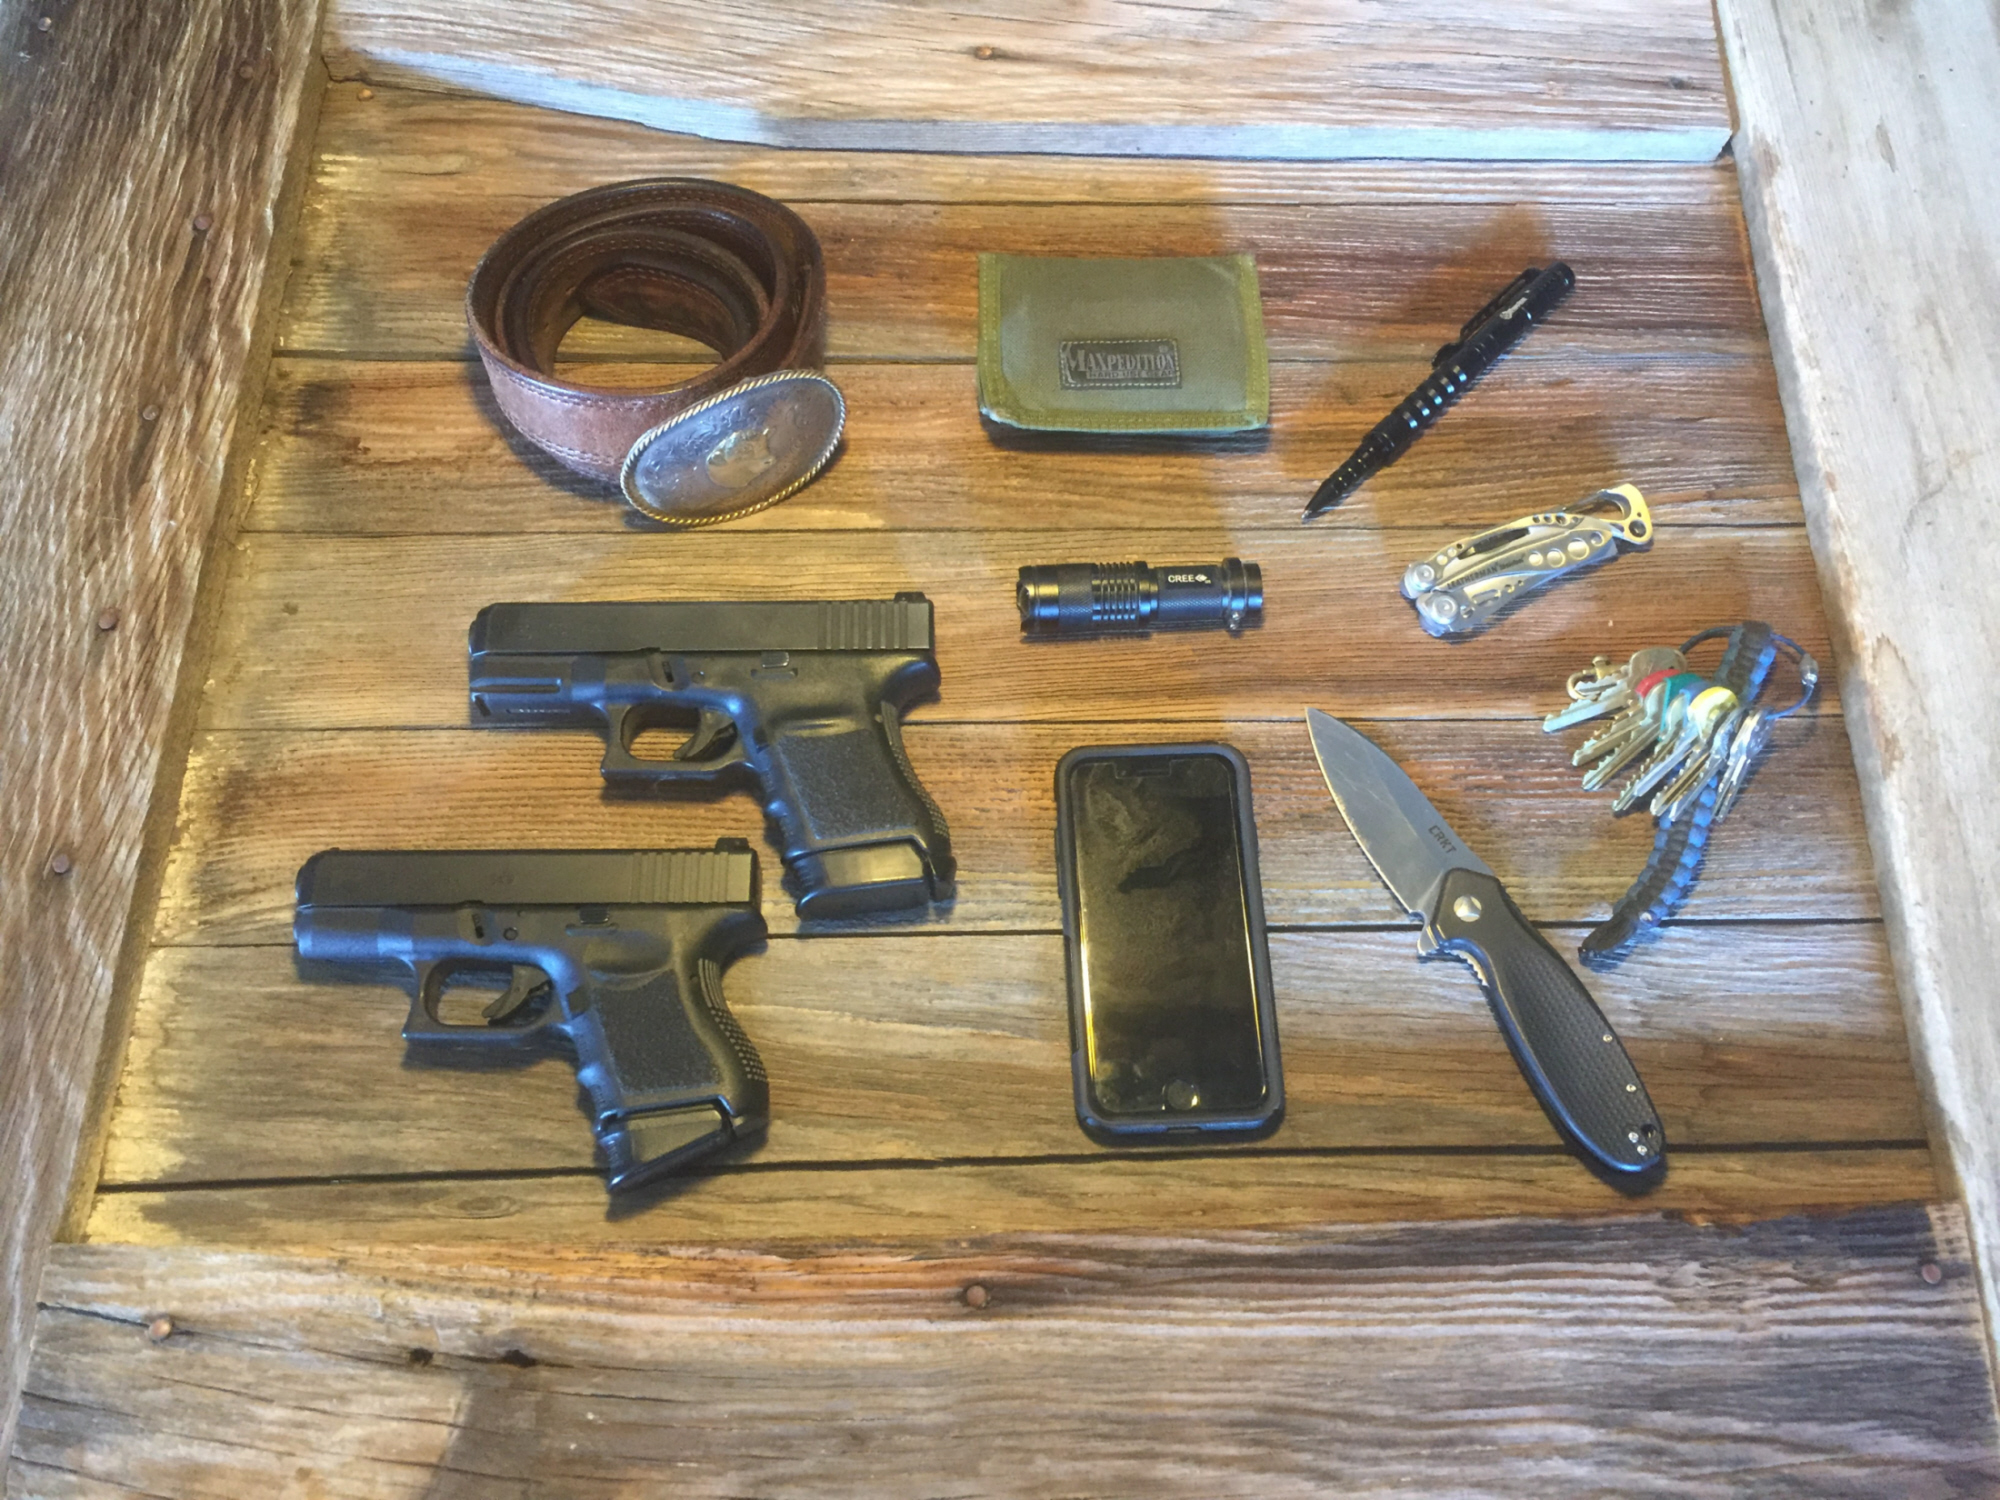
What Is My Handgun Preference In The Back Country
As I said earlier, I do not feel I would run into a Grizzly Bear in Colorado so one of the heavy magnum revolvers would not be necessary. My caliber of choice is the 10mm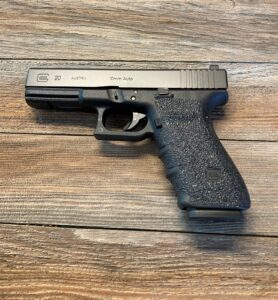 when loaded correctly it has a lot of knockdown power that will give you what you need in a trail gun. There are quite a few good handgun manufacturers out there that make the 10 mm, and the decision was a bit difficult. I have chosen the Glock 20, it is the full-size version with a 4.61-inch barrel that holds 15 rounds plus one in the chamber. They have a Glock 29 which is one of their subcompacts with a 3.78″ barrel and it holds 10 bullets in the magazine and one in the chamber. While it is also a great handgun, I like the full-size handgun with more rounds in the magazine. Some people insist on carrying a 44-magnum revolver with 5 or 6 bullets in the cylinder. They are more powerful then than a 10mm but I like having 15 bullets instead of 6 in my trail gun. Plus I can shoot a 10 mm better than I can a 44 mag and that is more important to me. A well-placed 10 mm round means more to me than a shot from a 44 mag that is not where I wanted it to go.
What Kind Of Ammo Would I Carry In It?
There are many different handgun calibers to choose from but as I mentioned, I like the 10mm as it is one of the most powerful semi-automatics available and I like the idea of having more rounds in my magazine instead of just 5 or 6 from a revolver. If I carry an extra magazine, that gives me 30 rounds of 10mm ammo if I need it.
Before the 10mm, I used a 45 ACP (45 ACP on the left and 10mm on the right)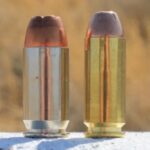 , while it is a great self-defense caliber and greater diameter bullet, it is fairly slow-moving and does not have enough energy to cause great damage to a predator if you need to use it. With the correct ammunition, a 10mm having a 180 gr bullet would go 1350 fps and have 728 ft. lbs. compared to a 230 gr 45 ACP bullet would have 830 fps with 455 ft. lbs of energy. If you were in a situation where you needed protection from a predator the 10mm would give you better odds.
How Would I Carry My Trail Gun?
There are many types of holsters available on the market today. Outside the waistband, inside the waistband, appendix, shoulder holster, and chest holster, to name a few. When I am hiking, biking, horseback riding, backpacking, hunting, or fishing, many of those above-mentioned holsters will not work. If you are being very active or wearing a backpack there is only one type of holster, in my opinion, that I see working in these situations, it’s the chest holster. The chest holster is a holster that is mounted on your chest, held there by a harness system that secures your handgun very well. There are many different manufacturers of a chest holster but there are two that I would stand by, Gunfighters, INC, and Diamond D Leather. Gunfighters.INC makes a Kydex chest holster named Kenai Chest Holster (upper picture) and Diamond D Leather
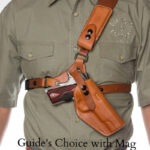 makes a leather chest holster named the Guides Choice Holster (bottom picture). They both are fantastic! I was told once that if you had a polymer handgun go with Kydex and if you had a stainless steel handgun, go with leather. I am partial to Kydex and therefore the Kenai Chest Holster gets my vote. They are a bit pricy but well worth it. They fit your handgun perfectly and are extremely secure. They are an all-weather holster that works over the top of your jacket or just under an outer shell. They have an extra magazine holder on the harness strap which is easy to get to. These holsters are ideal if you wear a backpack while in the outdoors. Just put on the holster and then put on your backpack and off you go. When it is time to rest you can remove your backpack and keep your handgun on your body. If you need your firearm they a very fast to get to and so very comfortable as your shoulders take all the weight of your handgun.
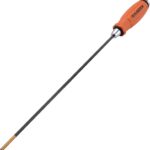 way to clean a gun is by using a cleaning rod. When I was young that was the only way to clean your gun so we did not question these rods. Cleaning rods do work great and now they are usually in the form of a one-piece coated rod or rods that screw together in sections to form a long cleaning rod.
 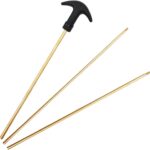 Whether they are one-piece or in sections they do a similar job in the end. A one piece rod is usually Teflon coated so it does not scratch the crown or the barrel. The cleaning rods that are in sections are usually made out of brass or aluminum and will not usually scratch your barrel. But it is a good idea to use a
  bore guide (protector) to protect your barrel crown when using these metal cleaning rods. You place them in the end of your barrel and then slip the cleaning rod inside the bore guide and into the barrel, this keeps the rod centered in the barrel and not scraping the barrel or crown of your gun. Cleaning rods can do a fine job as long as you are careful when using them.
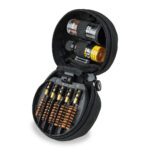 OTIS Technology. They make high quality gun cleaning kits with excellent customer service to back it up. They produce every kind of gun cleaning kits that you might want, my favorite is the OTIS Tactical Gun Cleaning kit for rifles, shotguns and handguns. It has everything
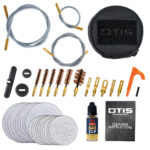 you would want to clean your guns and do a very thorough job I might add. An advantage to the cable system is that you do not have to teardown your gun so that you can clean from breech to muzzle. Because the cable is flexible you can just open up the action and put your cable end into the breech and slide it down the barrel to the muzzle. A pretty cool way to clean your gun.
 , add some bore cleaning solvent or CLP to the patch. place the opposite end of the cable into the barrel on the breech end push it through the barrel until the patch is at the end of the barrel. then draw it through the barrel, from breech to muzzle. 2) Remove slotted-end and put copper brush on the cable and draw through barrel from breech to barrel-end. Wait for a few minutes to let the chemicals work. 3) Then put the slotted tip back on along with a clean dry patch, as directed and draw the cable through the barrel from breech to muzzle and repeat this step until the patch comes out clean. End result is a clean gun.
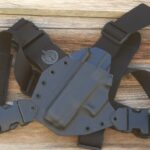 . This holster is designed to go over the top of your vest, jacket or other outer garment. so once you get it adjusted, it fits like a glove. Unlike a shoulder holster you should not trim the excess straps to fit because depending on the season and your layers under the harness may change. The holster holds your handgun very securely and is in a position that you can get to it very easily. This is a holster that works well in most all outdoor activities, I use it when hiking, backpacking, fishing, hunting, horseback riding, 4-wheeler riding, farm chores to name a few.
  and keeps your handgun in a place that is easy to get to. I use this holster with my Glock 30 (.45ACP) and Glock 20 (10mm), and the nice thing is all you need to do is buy a new shell for each caliber handgun, one harness will work with all the different shells. My favorite use for this holster is backpacking, You just put on this chest holster and then put on your backpack and you are ready to go. When you get to a resting place just remove your backpack and your handgun stays where it needs to be. I always had a difficult time figuring out where to put my handgun when backpacking and then being able to get to it when you needed to or taking off your backpack and off came your handgun too. Another plus about this chest holster is that it is
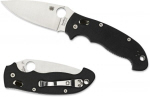 But everyone knows that we should all carry a folding knife, or should we?
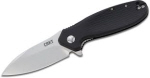 out there. It is safe, easy to conceal, and can be in a small package and placed in your pocket. For many years they have been known as pocket knives. It is easy to get in and out of your pocket for daily tasks and does not usually get in the way. Some of the folding knives have a locking mechanism which keeps it open until you wish to close it.
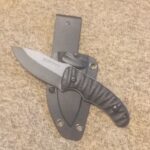 is much stronger and ridged since it is made out of a solid piece of steel, they can be used rougher and work stronger than a folder. They are more durable and hold up to the elements well because they do not have a folding mechanism as with a folding knife. A fixed-blade knife is easier to clean and maintain and can be deployed faster in a self defense situation.
 I can only put on a 4-shot side saddle on my receiver and that limits my extra shotgun shells capacity.
 until it is free from the end of the magazine and pull the barrel off, and set it aside.
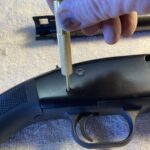 just above the trigger and place it in a dish or safe container so it does not get lost.
 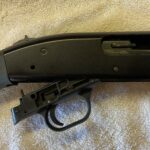 down and forward from the receiver and set it aside.
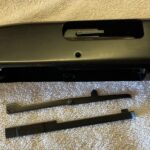 , two rails will become loose and they need to be set aside too.
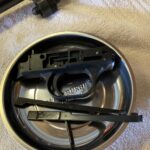 so they will not get lost.
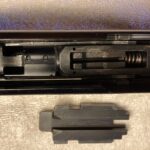
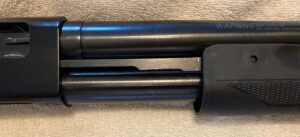
 you can pull the forend grip out of the receiver and off of the magazine tube.
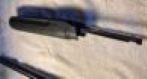
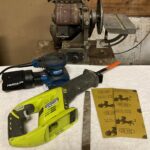 , as seen in the picture. My first choice would have been a bandsaw, but mine is out of commission right now.
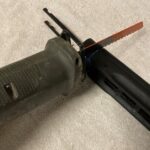 I had a metal cutting blade in it so the cut would be very smooth. As I cut the synthetic forend grip I cut very slowly so I could keep control of the saw so it would not over-cut the grip.
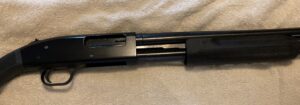
 , it really turned out great and if you did not know I changed it you would not know anything was different.
 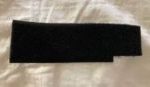 to fit your receiver so it will be easy to put on, making sure that the serial number is visible and not covered up by the Velcro.
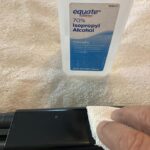 with alcohol to remove the dirt, oils, etc. that might cause the Velcro not to stick.
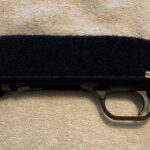 . Make sure you press all over the piece of Velcro so that the glue bonds to the receiver. (Leave it alone for a few hours so the glue sets well. It might be helpful to place a heavy book on top of the Velcro during those few hours).
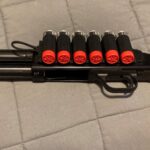 , I like to have the loop facing forward so I can pull it off in one clean motion after racking the slide, then replace it with a full one.
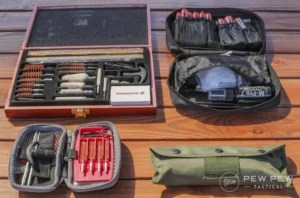 on the market today and here are a few that work very well:
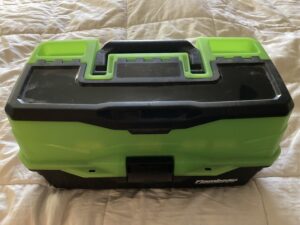 If you decided to build your gun cleaning kit from scratch, you would first need a container to hold everything. My favorite is a fishing tackle box with three shelves, they have plenty of dividers to keep all your items separate and organized. Once you have your container picked out then you need to customize your kit how you would like it. I have collected a lot of cleaning supplies through the years so making my own was very easy. I added brass cleaning rods, brass jags, cleaning patches, cleaning brushes (nylon and brass), Q-tips, pipe cleaners, cotton swabs, Hoppes #9 solvent squeeze bottle, Hoppes elite gun cleaner, Break Free CLP, and some wash clothes.
 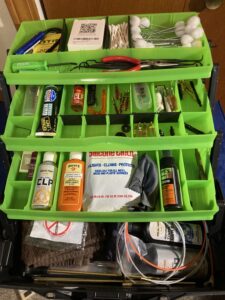 I have recently added a Otis Tactical Gun Cleaning System and it works great. I also added a bore scope, a 1911 front lug wrench, some small screwdrivers, needle nose pliers, a pick set (plastic), and some silicone rags. This is very mobile kit but I usually just use it at home for good gun cleaning. The newest addition to my cleaning kit is a Otis Tactical Gun Cleaning System, it has everything necessary to clean rifles, shotguns and pistols. It gives me the tools to always clean from the breech to the muzzle and that is the best way to clean. I just purchased a one piece cleaning rod to be used on very stubborn gun cleaning situations, these will not scratch your bore or crown when cleaning. I also added a smaller version of the Otis Cleaning System to my MB Sxowbmu Handgun Tactical Range Backpack (See the review on March 24,2022) for quick cleaning at the range.
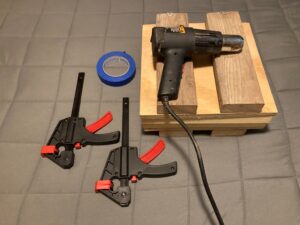 I take it a step further because I make my own knife sheaths, I use a Kydex press, some blue painter’s tape, two clamps to hold the press together, and the heat gun of course. Now some people say you can use a hairdryer but I do not feel it gets quite hot enough and therefore it can get frustrating. It is not in my picture but I like to also wear a pair of leather gloves to insulate your hands from the hot Kydex and decrease a chance of a burn.
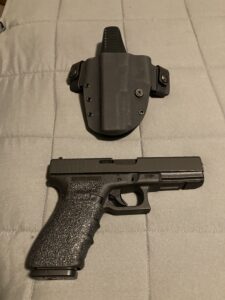 , it is an awesome OWB holster that I love to wear but it is just a little tight around the slide. I find if I do this to the holster, the finish on my handgun lasts much longer. Some people just use the heat gun to soften the Kydex, put your gun in the holster, and then systematically press on the holster in the areas that you want to change. I like to use blue painter’s tape in the areas that are tight, maybe two layers of tape to give just a little bit of clearance in those areas. Then you just can either put the holster in the Kydex press or just use hand pressure to conform the holster to the new desired contour of the holster. The Kydex Press works great when making a holster from scratch but once it is made and has belt loops, etc. already there. Hand pressure works best and does not disturb the entire holster.
 your handgun in those areas, as seen in the picture to your right. Place your leather gloves on your hands.
 surface. Place the handgun in the softened holster and begin to push down with your thumbs.
 makes it very difficult to hold down that lever so you can remove the slide. Trying to dig your fingernails into that little bar can be very frustrating. Installing a new extended slide stop is a very easy and simple modification that you can do yourself instead of going to a gunsmith. Installing this extended slide stop makes removing the slide so much easier. As you can see by the picture
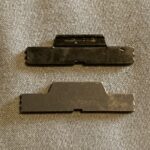 , the original slide stop on top and the new extended slide stop on the bottom is not a lot different in size, only about 4mm different in length. But just that much longer makes the takedown process much easier.
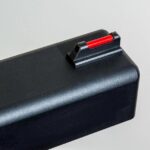 about the possibility that they can break and a broken sight renders the handgun almost useless.
 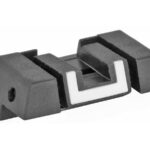 It is nice to be able to have an adjustable rear sight so you can easily zero in your handgun.
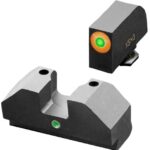 Sights. The reviews on them are really good and I have always wanted to try them out. These are a little different in the fact that it is not a three-dot system. There is only one dot in the front and one dot in the rear and you just line the dots up and shoot, they call it a figure eight. They too are made especially for Glocks and should be easy to install. So at least I have another option.
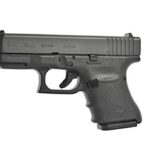 these grip extensions. But if you have a compact or subcompact, they will really work out nice for you.
 you add a pierce grip extension to your magazines, like the Glock 30 in the middle picture or the bottom picture in the Glock 26, you can add another finger to your grip, thus making your grip more stable.
 rest your pinky finger. The Glock 30 (middle picture) holds one extra bullet, while the bottom picture shows my Glock 26 with the grip extension that only rests your pinky finger, with no extra bullets. Whether you choose extra bullets or not, having a place for your pinky finger makes a big difference in control of your handgun and it looks pretty cool too.
 For about $20.00 and some personal labor, my handgun had better grip texture and is really pretty sweet. The package that you see comes with some great instructions, a pad with alcohol, and the pre-cut grips for your specific handgun. If you order these, make certain that you order the correct one for your handgun, as there are many different shapes available.
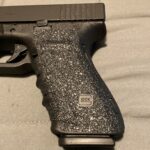 the alcohol pad to remove any dirt or oils on the grip. Then place the grip in the desired starting place and press down on the decal, pushing the air out as you go. Once complete, use a heat gun or hairdryer to heat up the decal which makes it tighter and finishes the job.