Putting on new sights on your handgun can be a difficult job. Back when I first started shooting all we had was a hammer and brass punch. While it got the job done it was a little difficult and the chances of marring your gun finish were substantial. Then came the sight pushers and that made this job a lot easier.
Using A Hammer And Punch
When I first began shooting there was no other way to install new sights. We all had brass punches that we used with a light hammer to install or adjust our sights. We would cover our slides with a towel and put our slides in a vise, clamp them down and punch the sight in or out as we needed. Doing things that way increased our chances of marring the guns finish.
Things To Watch Out For
When doing this procedure, we needed to make sure we covered the slide very well so we did not scratch the slide when holding it in the vise and also during the punching process, we had to be careful not to scratch our gun with the punch as well.
Using A Sight Pusher
Then came the sight pushers! It was some time around 2014 that they came on the market and the good ones made your life much easier. I say good ones because there were many on the market but they did not all work very well. If you wanted a good one then you had to pay for it. These good ones were over $100 and that was a lot of money for a tool that you only used a few times.
My first attempt at a sight pusher was to shop for price only and found a couple that was less than the higher priced ones, but unfortunately, they were garbage and did not work very well. That was very frustrating to me and a lesson well learned, you get what you pay for.
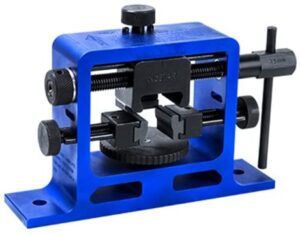
Using The VISM Universal Pistol Rear Sight Tool
Then one day I was looking in the Glock Store and noticed the VISM Universal Pistol Rear Sight Tool and it looked pretty cool. They had a video about it so I watched it, unfortunately I tried to post it but they removed it from Youtube..
It got me intrigued, and it was only $59, so I bought one. That was the best money I spent in a long time. What an excellent sight tool. It made the task of installing new sights a breeze. It took the frustration right out of the process. This should work for many makes of handguns and it is so easy to work.
Final Remarks
So what is the answer? Hammer & punch or a sight tool? If you are talking about using the VISM Universal Pistol Rear Sight Tool then the answer is yes! There are many on the market and not all of them work this easily. This tool is easy to operate and works very well and the chances of marring your gun’s finish is minimal, as long as you follow the instructions. I highly recommend this tool and I think that anyone that changes their sights needs one of these.
If you have any questions about this post or anything related to Everyday Carry (EDC)/Concealed Carry, feel free to leave a comment below and I will be happy to get back to you.
All the best,
Larry
Founder of Everyday Carry Essentials
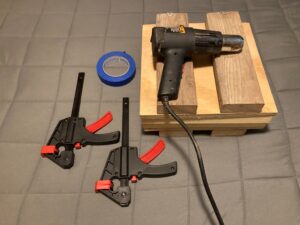 I take it a step further because I make my own knife sheaths, I use a Kydex press, some blue painter’s tape, two clamps to hold the press together, and the heat gun of course. Now some people say you can use a hairdryer but I do not feel it gets quite hot enough and therefore it can get frustrating. It is not in my picture but I like to also wear a pair of leather gloves to insulate your hands from the hot Kydex and decrease a chance of a burn.
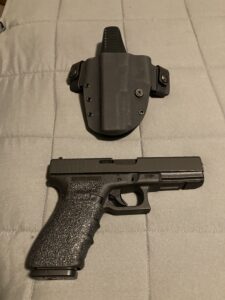 , it is an awesome OWB holster that I love to wear but it is just a little tight around the slide. I find if I do this to the holster, the finish on my handgun lasts much longer. Some people just use the heat gun to soften the Kydex, put your gun in the holster, and then systematically press on the holster in the areas that you want to change. I like to use blue painter’s tape in the areas that are tight, maybe two layers of tape to give just a little bit of clearance in those areas. Then you just can either put the holster in the Kydex press or just use hand pressure to conform the holster to the new desired contour of the holster. The Kydex Press works great when making a holster from scratch but once it is made and has belt loops, etc. already there. Hand pressure works best and does not disturb the entire holster.
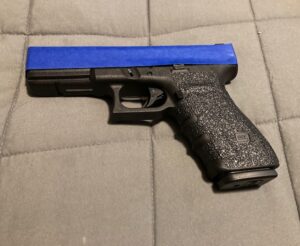 your handgun in those areas, as seen in the picture to your right. Place your leather gloves on your hands.
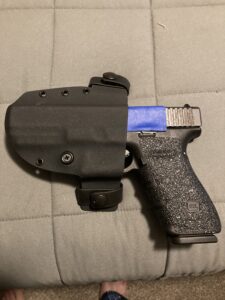 surface. Place the handgun in the softened holster and begin to push down with your thumbs.
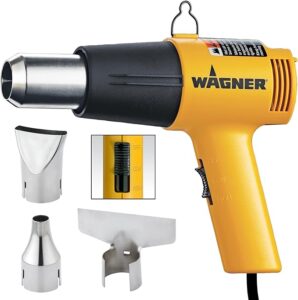

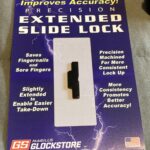 makes it very difficult to hold down that lever so you can remove the slide. Trying to dig your fingernails into that little bar can be very frustrating. Installing a new extended slide stop is a very easy and simple modification that you can do yourself instead of going to a gunsmith. Installing this extended slide stop makes removing the slide so much easier. As you can see by the picture
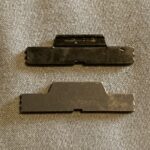 , the original slide stop on top and the new extended slide stop on the bottom is not a lot different in size, only about 4mm different in length. But just that much longer makes the takedown process much easier.
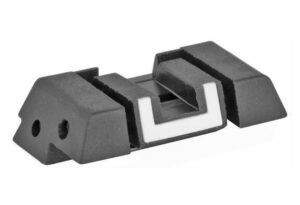
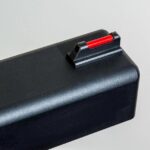 about the possibility that they can break and a broken sight renders the handgun almost useless.
  It is nice to be able to have an adjustable rear sight so you can easily zero in your handgun.
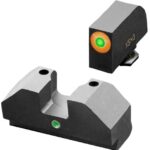 Sights. The reviews on them are really good and I have always wanted to try them out. These are a little different in the fact that it is not a three-dot system. There is only one dot in the front and one dot in the rear and you just line the dots up and shoot, they call it a figure eight. They too are made especially for Glocks and should be easy to install. So at least I have another option.
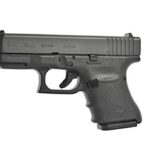 these grip extensions. But if you have a compact or subcompact, they will really work out nice for you.
 you add a pierce grip extension to your magazines, like the Glock 30 in the middle picture or the bottom picture in the Glock 26, you can add another finger to your grip, thus making your grip more stable.
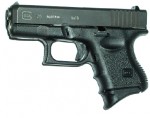 rest your pinky finger. The Glock 30 (middle picture) holds one extra bullet, while the bottom picture shows my Glock 26 with the grip extension that only rests your pinky finger, with no extra bullets. Whether you choose extra bullets or not, having a place for your pinky finger makes a big difference in control of your handgun and it looks pretty cool too.
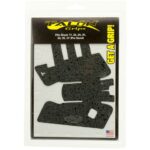 For about $20.00 and some personal labor, my handgun had better grip texture and is really pretty sweet. The package that you see comes with some great instructions, a pad with alcohol, and the pre-cut grips for your specific handgun. If you order these, make certain that you order the correct one for your handgun, as there are many different shapes available.
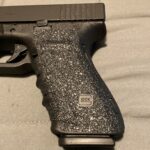 the alcohol pad to remove any dirt or oils on the grip. Then place the grip in the desired starting place and press down on the decal, pushing the air out as you go. Once complete, use a heat gun or hairdryer to heat up the decal which makes it tighter and finishes the job.
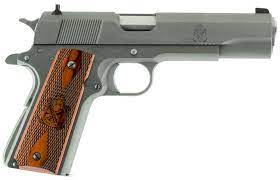 for a pretty good price. It was a basic model but it worked fine for me. I went to a gunsmith and had him install an ambidextrous safety, a beavertail grip safety, and polish the feed ramp for reliability. Then I sent my slide to Novak’s and had him install a set of night sights, so it was just as I wanted it for shooting. It shot really well and gave me something I could enjoy for many years.
 in a pawn shop, it was also very basic but brand new and was something I could enjoy turning into a gun that I really wanted. I took it to a gunsmith and had him polish the feed ramp and a few other things to make it very reliable. Then I sent it to Novak’s to put on a set of night sights so it would shoot better. I traded the black plastic grips for some better black rubber ones and that made things much better when I shot the handgun.
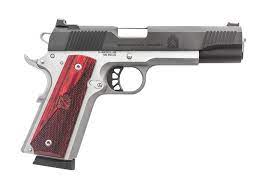 . I was extremely surprised, I never thought I would see one of those new designs this soon after production. Besides being a beautiful handgun it has all the things I put on my old 1911 and a few more except the ambidextrous safety at a very reasonable price. They had two variations of this gun, one with a 5″ barrel and the other with a 4.25″ barrel. Since I would like to carry it concealed, I thought the 4.25″ barrel would be the best choice. Now the tug-of-war began between buy it now or buy it later. I knew that the way the gun market was at that point, it may not be there if I waited. So I decided to buy it at that time and I did! How exciting!