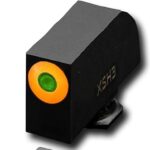
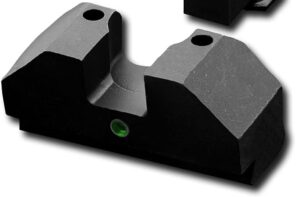
XS SIGHTS, F8 NIGHT SIGHTS

Product Review

Nice Night Sights

Product: XS Sights, F8 Night Sights

Price: $109.00

Durability: High

Best Place To Buy This Product: Amazon

My Overall Rating: 9.5

Quick Product Overview:

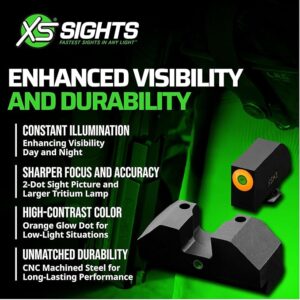
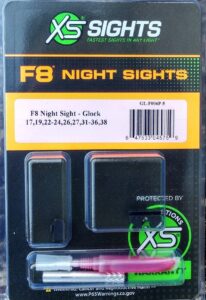
F8 sights are taller than traditional night sights on the market for a more natural sight alignment and can serve as backup iron sights for some pistol reflex sights. (call 888-744-4880 for specific models) F8 night sights give you the best notch and post sight solution for visibility in all lighting conditions and incorporation with new reflex technology. The 2-Dot alignment system simplifies the rear and draws focus to the front sight. 

Specifications Of This Product:

  • F8 Night sights are designed to increase front sight focus by using a large 0.160”,
  • High-contrast front post for fast sight acquisition.
  • The front is paired with a 0.190” wide-notch rear sight to allow for greater visibility of the front post in decreasing light levels.
  • The front sight’s equipped with our Ember glow dot that absorbs light and glows in low light levels before tritium becomes visible. 

What I Like About This Product:

I like the height of the sights, almost suppressor height. The sights are easy to see and the front sights are very easy to pick up in low light conditions. I am not a big fan of 3-dot sight systems, so the 2-dot system works well for me.  

What I Would Change About This Product:

As of right now, I would not change anything about them.  I have only had them on my handgun for a short time.  Once I use them for a while longer I might change my mind.

Final Remarks:

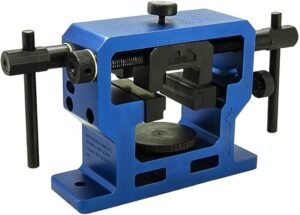
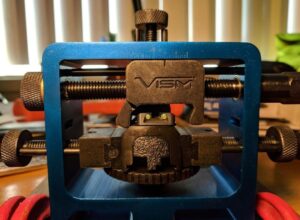
I found these night sights very easy to install, I used my VISM sight pusher and it worked well. I also found these sights even easier to “pick up” in low light, and more usable than any other gun sight I have tried on my other handguns. F8 Sights are high visibility pistol sights that are designed for fast target acquisition. The coolest feature of these sights was the fact that they handled changing light conditions very easily. I recommend these night sights very highly. 

If you are interested in this product, click here.  Thanks for reading this product review.

If you have any questions about this product review or anything else related to Everyday Carry (EDC)/Concealed Carry, feel free to leave a comment below and I will be happy to get back to you.

Thanks,

Larry

Founder of Everyday Carry Essentials
    LEAVE A REPLY

    Your email address will not be published
    Required fields are indicated

    WILLIAMS 5D WINCHESTER 94/36 PEEP SIGHT

    Product Review

    Very Nice Peep Sight

    Product: Williams 5D Winchester 94/36 Peep Sight

    Price: $39.90

    Durability: High

    Best Place To Buy This Product: Amazon.com

    My Overall Rating: 9.0

    Quick Product Overview:

      • 5D SERIES RECEIVER SIGHTS – For Big Game guns, fits Winchester 94 Top eject, 55, 63, 64, 65, 9422; sidedrilled Marlin 36, 336, 444, 44mag, 93, 1894, 1895, 1895G pre 2001
      • ADJUSTABLE – Positive Windage and Elevation Locks
      • MATERIALS – High-grade alloy is finished with an anodize in a deep blue-black that adds even further to the strength of the sight by creating an extra hard surface
      • LIGHTWEIGHT, STRONG, ACCURATE – Designed for rugged hunting use, the 5D sights are dependable and accurate

    Specifications Of This Product:

    Brand‎Williams
    Color‎Black
    Style‎5D Series 94/36 Receiver Peep Sight – 1398
    Sport‎Hunting
    Material‎High-grade alloy
    Magnification Minimum‎8 x
    Compatible Devices‎Rifle
    Mounting Type‎Dovetail Mount
    Night vision‎No
    Model Name‎5D Series 94/36 Receiver Peep Sight – 1398
    Manufacturer‎Williams
    Reticle Type‎Peep
    UPC‎053506013982
    Item Package Dimensions L x W x H‎7.13 x 5 x 2.13 inches
    Package Weight‎0.06 Kilograms
    Brand Name‎Williams
    Suggested Users‎unisex-adult
    Number of Items‎1
    Part Number‎1398
    Included Components‎1 item

    What I Like About This Product:

    The Williams 5D Winchester 94/36 Peep Sight is easy to install and easy to use, while the windage and elevation adjustments are not “click” adjustments, they still work very easy.  The peep is a good size for normal use and depending on the front sight that you have, it is very easy to see. Plus most Winchester’s or Marlin’s have the holes drilled and tapped so you just remove the plug screws and you are ready to install the Williams sight right away.

    What I Would Change About This Product:

    It would have been nice to have a couple of different apertures that came with the sight but they can be purchased if you need something different.

    Final Remarks:

    You might wonder  why I am reviewing a rifle peep sights on a everyday carry website?  Well many times my lever action Winchester 94 is part of my everyday carry gear. Either around my home acreage or in my pickup when I am scoping-out predators who are taking my livestock.

    So let’s get back to this article: Peep sights are much more accurate then the semi-buckhorn sights that come with a Winchester 94, in my opinion.   Especially as your eyes get older!  Looking through the aperture to the front sight is much easier then the semi-buckhorn sight.  You only need to look through the rear aperture  at the front sight and your eye automatically centers the front sight in that aperture. Nice! Plus adding a peep sight gives you about 9 inches more sight radius which helps your accuracy.  So I feel it is the best thing for iron sights. The only thing is you will more than likely need to install a taller front sight on your rifle before it will work correctly. But that is not a big deal, you can do it yourself, it just takes a punch & mallet and a little time to get it all setup.  I highly recommend this sight for any Winchester or Marlin lever action rifle.

    If you are interested in this product, click here. Thanks for reading this product review.

    If you have any questions about this product review or anything else related to Everyday Carry (EDC)/Concealed Carry, feel free to leave a comment below and I will be happy to get back to you.

    Thanks,

    Larry

    Founder of Everyday Carry Essentials
      LEAVE A REPLY

      Your email address will not be published
      Required fields are indicated

      How Do You Break-In A New Handgun or Rifle?

      This is a very controversial subject and there are many points of view, some people feel it very important and others think that it is a complete waste of time. You can contact most of the gun manufacturers and they will not even mention anything about “Break-in Procedures”.  So, what do you think? Is it important or not? Maybe my comments will help you decide, Let’s talk about it.

      Is Breaking In A New Handgun Or Rifle Important?

      Well I have done a lot of research about this subject and here is what I think: If I purchase a new handgun or rifle, I want it to operate to the best of its ability.  If I am spending my hard-earned money on a firearm then you can bet I will do whatever it takes to make it operate at its best. If by chance going through certain break-in procedures will give my handgun or rifle a better chance to operate well, I am not going to ignore those really good procedures that might make it operate better just because some people say it is a waste of time. I will admit, some people do go way overboard in their break-in procedures so I have combined some procedures which make sense to me and have come up with what I think will work well as break-in procedures and I thought they might be of interest to you.

      What Supplies Are Necessary To Carry Out A Break In Procedure?

        • A Good Rifle Cleaning Rod
        • A Good Handgun Cleaning Rod
        • An OTIS Gun Cleaning Kit for handguns and rifles
        • Hoppes #9 Solvent
        • Non-Ammonia-based Solvent
        • Break-free CLP
        • Cleaning patches
        • Kroil Oil

      My Handgun Break-In Procedures

      The first thing to do after you purchase a new handgun is read your handgun manual, you will get a lot of great insight about your new handgun.  Even if you have other handguns, you need to know that handgun inside and out. Next, make certain that your handgun is unloaded: remove the magazine, work your action 5 or 6 times to make certain there are no bullets in your gun.  Now place you finger in the chamber to verify that it is unloaded.

      Next step – you need to examine your handgun, check things over to see if there are any visible problems or concerns before you shoot it and so you will be able to tell if things change after you shoot it. First, field-strip your handgun and remove all oil and grease on the inside and outside of your handgun using Hoppes #9 and a brush  and cloth. Make sure that you remove excessive lube, Some of the lube is there as a preservative, but in some cases, some of it is there to facilitate break in and you don’t necessarily want to strip it all off.

      When this is done, reassemble your handgun and generously lube as directed by your gun manual. (Drop of oil on each side rail, drop of oil on the barrel hood, drop of oil on the outside of the barrel and spread around, then rack the slide several times). Wipe down the whole exterior of the handgun. Now its time for the range,

      Get your favorite bullets (usually FMJ), they recommend shooting at least 200 rounds through your handgun before it is broken-in. I like to shoot my 200 rounds in smaller groups: 25, 25, 50, 50, and 50. I clean my handgun using an Otis cable system in between each of those groups when I am breaking in my handgun so I will get rid of any fouling that’s in the barrel. Remember, during this break-in procedure a handgun might have some hiccups, or malfunctions when you are first shooting it.  So be prepared for that and just work through them and see if they go away after a few more bullets have been fired through it.

      Once your 200 rounds have been shot, take your handgun home and repeat the field stripping and gun cleaning, as described above. Check for excessive wear, see if anything changed, and then reapply lube where applicable based on the manufacturer’s guidance and based on where you see wear and reassembly your handgun. Next time at the range I wouldn’t expect to see any malfunctions.

      FMJ bullets is a great bullet to use as practice ammo. They usually feed very reliable and are more economical to shoot. Once your handgun has completed the break-in procedures, make sure to also shoot your self defense bullets through your handgun, you need to make sure that they cycle through your handgun consistently and make sure you can shoot them well before you use them in a situation to protect your life.

      My Centerfire Rifle Break-In Procedures

      As with your handgun, the first thing to do is read through your rifle manual so you learn all about it. Before you do anything with your rifle you must check to see that it is completely unloaded. If you have a magazine – remove it.  Then work your action 5 or 6 times to eject any bullets that might be in your gun.  Then visually check the chamber and magazine area for any bullets and then place your finger in there to verify that it is clear.

      Now you can examine your rifle completely for any issues, problems, or blockage, then examine your rifle to make certain that it is unloaded. Then disassemble your rifle placing all your small parts in a container (so they don’t get lost), and the large parts can be placed in order on your gun cleaning mat. Then clean each piece (large and small parts) to remove any grease or oil left behind by the manufacturer and place them back on the mat or container for reassembly.

      My next step is to scrub the barrel, wrap a slightly undersize bore brush with a patch, wet the patch with a non-ammonia-based solvent, and scrub that barrel, from breech to muzzle, then remove brush from rod and remove the rod from barrel, put brush back on rod and then do that 15 or 20 passes. (Do not go back and forth in the barrel, only one direction from breech to muzzle).

      Next, switch to a proper-fitting jag and clean the barrel with patches dampened with Hoppes #9 solvent, and push them through the bore, breech to muzzle, let the solvent sit in the bore for a few minutes and then switch to dry patches and clean again until they come out clean.

      Once this procedure is completed, it is time to reassemble your rifle and add lubricant as suggested by your owners manual. During the break-in procedures I add a bit more lubrication to my rifles while things are initially working together as there is more friction going on until the rough edges get a bit smoother. Make certain to wipe the exterior of your rifle down very well before proceeded to the next step. Now its time to shoot your rifle:

      The shooting portion of this break-in procedures is made up of a series of shooting and cleaning after a certain number of bullets have been fired. This helps minimize any buildup of gun powder residues to keep the barrel clean: First shoot 1 single shot, and clean the barrel using an Otis cable system until it is clean, then apply a thin layer of Kroil oil, It’s a penetrating oil that’s proven exceptionally good for seasoning the inside of rifle barrels. This helps prevent the fouling from sticking. Also begin to zero your rifle as you shoot these first 5 shots so you should be dead on target. Then shoot 4 more single shots and clean the barrel after every shot, and also apply Kroil oil as before. Once those first five shots have been fired and cleaned, then begin to shoot 3 groups of 5 bullets and clean after every 5-shot group. Also apply the Kroil oil as before. Once these last three 5-shot groups have been shot and cleaned, your break-in period is complete. Take your rifle home and clean it completely so you are ready for more shooting.

      Bullet selection is up to you and your pocket book for use. If you choose to use jacketed bullets then break in with jacketed bullets. This break-in procedure takes 20 shots, once complete, you are ready for normal shooting.

      But no matter how many bullets you shoot from here on out always, always, always clean your rifle after every shooting session. Then lube, all moving parts, wipe down your gun with rag that containing Break Free on it, or use the Otis wipes, this includes your stock and other parts, etc. Finally, run a patch through the bore with Break Free on it and put it away in storage.

      My Rimfire Rifle Break-in Procedures

      Again, always begin with reading your rifle manual to learn everything about that rifle. The first thing to do is make certain that your rifle is unloaded, if you have a magazine – remove it.  Then work your action 5 or 6 times to eject any bullets that might be in your gun.  Then visually check the chamber and magazine area for any bullets and then place your finger in there to verify that it is clear. Now check the entire rifle for problems then, disassemble your rifle placing all your parts in a container so they don’t get lost and clean each piece inside and out to remove any grease or oil left behind by the manufacturer. Pay special attention to the bolt, breech face, action, chamber, throat & crown may need slightly more attention.

      Next step is to pre-Scrub your barrel, wrap a slightly undersize bore brush with a patch, wet the patch with a non-ammonia-based solvent, and scrub that barrel, from breech to muzzle, then remove brush from rod and remove the rod from barrel, put brush back on rod and then do that 10 to 15 passes. (Do not go back and forth in the barrel, only one direction from breech to muzzle). Next we scrub your barrel: Switch to a proper-fitting jag and clean the barrel with patches dampened with Hoppes #9 solvent, and push them through the bore, breech to muzzle, let the solvent sit in the bore for a few minutes and then switch to dry patches until they come out clean. Once this procedure is completed, it is time to reassemble your rifle and add lubricant as suggested by your owners manual, lastly, wipe down the entire exterior of the rifle to make sure it is clean.

      Now its time to shoot your rifle, get your favorite 22 long rifle ammo, load your magazine and begin shooting your rifle: 10 round group, 20-round group, 20-round group, 50-round group and a final 50-round group. Run an Otis cable cleaning system through your barrel after each 10, 20, 20, 50, and 50  round groups using a brush with Hoppes #9 solvent (let it set for a few minutes) then run clean patches through the barrel until they’re clean and then go to the next group of shooting.  As you are shooting your first groups you also need to zero your sights, that way you will be dead-on target before you complete your break-in period. When you have gone through 150 bullets your break-in period is complete for rimfire rifles.  Now it is time to clean your rifle completely using Hoppes #9 solvent, Break Free CLP and Gun Butter for a final lube then either put it away for storage or go out and shoot some more. 

      Final Comments

      As I said, I spent a lot of time doing research about this subject, mixing and adjusting information to come up with what I think is a pretty good set of procedures for breaking-in your firearm.  I would be very interested in hearing what you think about these procedures. Do you like them?  Hate them? Think they are a joke?  So far they have worked very well for me and so I will continue using these procedures. I would really enjoy your feedback. Thanks for reading this article.

      If you have any questions about this post or anything related to Everyday Carry (EDC), feel free to leave a comment below and I will be happy to get back to you.

      All the best,

      Larry

      Founder of Everyday Carry Essentials

        LEAVE A REPLY

        Your email address will not be published
        Required fields are indicated

        How Do You Paint Your Handgun Or Rifle Sights?

        I bought some new front sights from Skinner Sights for two of my rifles, they come completely black and I wanted to paint part of them white so I thought this would be a good subject for another article. If you need some new sights for your firearms be sure to check them out Skinner Sights, they are an awesome company and their customer service is the best in the business, their website is skinnersights.com . Since the sights that I purchased have not been installed on my rifle, I just painted them first before I installed them, but you can do it eight way.  Although, I would not remove my sights just to paint them, keep them on your handgun or rifle.

        A gun is only as good as the sights that they have on that gun. Good sights lead to a good sight picture and therefore helps you hit what you are aiming at.  While this article is mainly about painting your gun sights and improving your sight picture, there are also some other options that we will touch on here as well. But let’s get back to our topic and see just how easy it is to upgrade your handgun or rifle sights to give you that GOOD SIGHT PICTURE. 

        Is Painting Your Sights Your Only Option To Upgrade Them?

        Painting your sights is not your only option, but it is a good choice most of the time and it can be done . What are some of your other options for handguns or rifles?:  Fiber Optics and Night Sights are two of your main competitors when it comes to improving your sights.

        Fiber optic sights offer advantages in bright to moderate lighting conditions by providing a clear, bright, and easily visible aiming point, potentially aiding in faster target acquisition and shooting. However, they rely on ambient light, making them less effective in total darkness compared to night sights that glow with tritium.

        What are fiber optic sights made of?:
          • The core of the fiber optic strand is typically made of glass (often silica) or plastic (like PMMA). 
          • The core is surrounded by a cladding, a layer that reflects light back into the core, enabling efficient light propagation. 
          • The fiber optic strand absorbs ambient light and channels it to the front sight post, creating a bright and illuminated aiming point. 
          • Fiber optic sights are often available in colors like red, green, and yellow. 
          • While the fiber optic strands themselves are delicate, the sights are designed with durable housings to protect them. 
          • When light strikes the fiber optic strand at an angle less than the critical angle, it travels down the fiber without leaking out. This process, called total internal reflection, concentrates the light at the end of the fiber, resulting in a bright, illuminated sight. 

        Night Sights in no way distract from acquiring the dot. However they also offer no benefit. When it’s dark enough to need the night sights your dot will be way brighter. Then when using any white light to identify a target the night sights will wash out and not be able to be seen. Night sights, designed for low-light visibility, typically utilize tritium, a radioactive isotope of hydrogen, which emits beta radiation that excites phosphor material, causing it to glow. 

        What are night sights made of?:
          • Tritium is a radioactive gas encapsulated in a small, durable glass vial. 
          • The beta particles emitted by the tritium interact with a phosphor material, causing it to glow. 
          • The glow provides a self-illuminated sight picture in low-light conditions, allowing shooters to accurately aim their firearms. 
          • Tritium has a half-life of approximately 12.5 years, meaning that after that time, the sights will emit half as much light as they did when new. 
          • Tritium is a low-energy beta emitter, and the small amount used in night sights is considered safe and poses no external dose hazard. 
          • Some sights use fiber optics, which are illuminated by ambient light, rather than tritium, and can be a good option for well-lit environments. 
          • The color of the emitted light can be manipulated by using different phosphors, allowing for a range of colors, such as green, yellow, orange, or red.
             
            While these two options are very good, they are also much more expensive.  But I had to mention them so you would understand that there are other options.  So let’s get back to painting our sights. 

        What Supplies Are Needed To Paint Your Sights?

        I am going to look at what I normally use to paint my gun sights, but I will give you another option if you would like it. The methods are the same but the paint options are different.  I use a good quality spray paint to paint my sights but there are other options, model paint or fingernail polish works too.  I like the way spray paint flows on your serrations, model paint or fingernail polish is very thick to work with. A very easy option is to use Sight Paint Pens from Birchwood Casey that work great but they are a lot more expensive.  If you have quite a few sights to re-paint this might be an option, but for only one or two sights it is a bit high in cost.

        Method #1:

          • Krylon satin white spray paint, model paint, fingernail polish
          • Cup (for spray paint)
          • Isopropyl Alcohol or Brake Cleaner
          • Q-tips or Cleaning cloth
          • Blue masking tape
          • Scissors
          • Toothpicks or small foam paint brush (not bristle-type)
          • XACTO knife-sharp blade (Optional)

        Method #2:

          • Birchwood Casey Sight Pens (White, Orange & Green)

        How Do You Prepare The Areas That You Want To Paint?

        Preparation for both methods will be the same:

          1. Dip your Q-tips in some Isopropyl Alcohol and wipe down the sight that you are going to pain. If there are any serrations that you will be painting, make sure that you get down deep in the serrations so the paint will stick. Then let it dry completely before painting.
          2. If you decide to use Brake Cleaner, just spray on the area to be painted and wipe down the area with a Q-tip or cloth. The nice thing about this cleaner is is evaporates very quickly so you do not have to wait very long for it to dry. As I said above, if the sight has serrations, clean them very well so the paint will stick.
          3. Next use the Blue Painters Tape to mask around the area that you will be painting.  I would rather take some  extra time up front to mask the area good so  the paint will go where I want it to go rather than drip paint on the side of the sight and then have to scrape the paint off after it is dry. I like to cut the tape in strips and place them around the area to be painted, it is easier that way. (It is very important to make sure the edges of your tape are pressed well.

        What Is The Proper Procedure To Paint Gun Sights?

        There are two methods that I have used that get you some great results:

        Method #1:

          • Clean the cup of any debris and then spray the paint inn the cup so you have a nice amount of paint to use.
          • Pick up your sight and hold it firmly so it will not slip out of your hands.
          • Place the small paint brush in your other hand and touch the brush to the paint until it is well coated. (Some people like to use a toothpick instead of a brush, it depends if you are painting dots or strips).
          • Roll the paint brush on the edge of the cup to remove the excess paint from the brush. 
          • Touch the brush to the area to be painted with little strokes to make sure all surfaces have been painted.
          • Once completed, place the sight as flat as possible so the paint does not run some place that you do not want it to.
          • Wipe the paint off of the paint brush using an absorbent paper towel so you can re-use the paint brush and not have to get a new one.
          • It will take 2-3 coats of white paint to cover a black sight.
          • Let the paint dry over night before you do another coat of paint.

        Method #2:

          • The only difference is to paint using the pens rather then the toothpick you do not need the cup, spray paint or paint brush to paint the sights..

        Does Letting The Paint Dry Matter?

        When you are doing a procedure such as this, we become anxious and want to move on to the next step. Juse remember yes, it is very important to let your painted sights dry over night before you touch them.  If you try to take the masking tape off of the sight before it is dry. the sight may become streaked or smudged and then you will have to do it again. It is now that you will be very glad that you took the extra time to used the Blue Painters Tape around the area that you were painting.  Less mistakes!

        Final Comments

        This method works for both handguns and rifles and the end result is well worth the effort. It take more time to get the supplies together then I doe to paint your sights but having new bright white or whatever color that you decide to paint them, makes all the difference in the world.  So if you have a firearm with blacked-out sights or the paint is fading or falling off, now you know how to fix that problem.  It is very easy to do and it beats paying a gunsmith to do it for you.  Good luck!

        If you have any questions about this post or anything related to Everyday Carry (EDC), feel free to leave a comment below and I will be happy to get back to you.

        All the best,

        Larry

        Founder of EDC Essentials

          LEAVE A REPLY

          Your email address will not be published
          Required fields are indicated

          NITECORE EDC25 ULTRA SLIM FLASHLIGHT

          Product Review

          Cool Flashlight

          Product: Nitecore EDC25 Ultra Slim EDC Flashlight

          Price: $7495

          Durability: High

          Best Place To Buy This Product: Amazon.com

          My Overall Rating: 9,0

          Quick Product Overview:

          The Nitecore EDC25 is an ultra high-performance EDC flashlight capable of a 3000 lumen max and a max beam throw of 328 yards. It is designed to be easily carried in your pocket, the EDC25 has a thin build of only 0.84” and weighs 3.67 oz. This flashlight can be charged via its built-in USB-C port, with power indicators providing battery-level information. When fully charged, it can provide up to 55 hours of continuous use and can be fully charged in just over 1 hour. Just fully press the Power Button to turn it on/off, half-press to cycle through four brightness levels. Additionally, instant access Turbo or Strobe modes via the customizable button. This flashlight contains the Nitecore EDC25, a lanyard, a USB-C charging cable, and a Nitecore sticker.

          Specifications Of This Product:

          Special Feature              Lightweight, Adjustable Light Modes, Non                                                          Slip Grip, Durable, Rechargeable

          Color                                    Black

          Power Source                  Battery Powered

          Light Source Type         LED

          Material                              Anodized Aluminum

          What I Like About This Product:

          This Nitecore EDC25 Flashlight is very lightweight and compact with a really bright light for a small flashlight. It seems to be a very high quality build and feels good in your hand when holding it. If you place it in your pocket, you can hardly feel it is there..  

          What I Would Change About This Product:

          The battery life could be increased and the controls can be a bit frustrating to use.

          Final Remarks:

          This is a nice flashlight that is very bright and compact.  While the flashlight is good, the controls are a bit complex and could easily be simplified.  OFF-HIGH and LOW would have worked for me.  But it is a great flashlight and works really well.  If you are tired of the traditional round flashlights and want something that will slip in your pocket easily, try this one.

          If you are interested in this product, click here.  If you are interested in similar products, click on the link below and it will take you to my EDC Flashlight page, Thanks for reading this product review.

          Go To EDC Flashlight.

          If you have any questions about this product review or anything else related to Everyday Carry (EDC)/Concealed Carry, feel free to leave a comment below and I will be happy to get back to you.

          Thanks,

          Larry

          Founder of Everyday Carry Essentials
            LEAVE A REPLY

            Your email address will not be published
            Required fields are indicated

            EVERLIT EMERGENCY COMPRESSION BANDAGE

            Product Review

            Excellent Compression Bandage

            Product: Everlit Emergency Compression Bandage

            Price: $19.95

            Durability: High

            Best Place To Buy This Product: Amazon

            My Overall Rating: 9.0

            Quick Product Overview:

            The Everlit Emergency Bandage is designed to stop bleeding from hemorrhagic wounds caused by traumatic injuries in a rapid, extremely effective, and easy way. For both professional and non-professional caregivers to provide effective wound treatment.  The compression bandage is individually vacuum sealed and sterilized To achieve long shelf life, For more wound coverage and security, the bandage is made with extra wide 6 inch non-adherent absorption pad, with over 7 foot elastic wrap unfolded. This pressure bandage has been widely adopted by U.S Arm Forces with years of combat proven history. The compression trauma bandage, chest seal, hemostatic agent, and tourniquet are the must-have supplies for packing your IFAK.

            Specifications Of This Product:

            BrandEVERLIT
            MaterialCotton
            Size6 Inch (Pack of 3)
            StyleElastic
            Sterility RatingSterile

            What I Like About This Product:

            The EVERLIT Emergency Compression Bandage is a critical addition to any first aid kit. This product is designed for quick and effective bleeding control, it is well-made and easy to use, even under stressful conditions. The 6-inch width provides substantial coverage, it makes it work well  for larger wounds (deep cuts, or other traumatic injuries). This compression bandage allows you to apply significant pressure to the wound, which is crucial for controlling severe bleeding until medical help can shows up. The vacuum-sealed packaging ensures that the bandage remains sterile until it’s needed, and its compact size means it fits easily into any medical kit or IFAK (Individual First Aid Kit). This bandage is designed for more serious injuries, so it may not work the best for  minor cuts, etc. However, for anyone who needs a reliable and effective solution for major trauma, this bandage is perfect.

            What I Would Change About This Product:

            It is good just the way it is.

            Final Remarks:

            The EVERLIT Emergency Compression Bandage is an essential piece of gear for anyone who wants to be prepared for serious, life-threatening situations. Its design and effectiveness make it a great choice for trauma care, and I highly recommend this bandage for you emergency first aid kit use.  Check it out if you can.

            If you are interested in this product, click here.  If you are interested in similar products, click on the link below and it will take you to my EDC Survival/Medical page, Thanks for reading this product review.

            Go To EDC Survival/Medical.

            If you have any questions about this product review or anything else related to Everyday Carry (EDC)/Concealed Carry, feel free to leave a comment below and I will be happy to get back to you.

            Thanks,

            Larry

            Founder of Everyday Carry Essentials
              LEAVE A REPLY

              Your email address will not be published
              Required fields are indicated

              GRAND WAY MINI MULTITOOL 12 IN 1

              Product Review

              So Tiny, But It Works

              Product: Grand Way Multitool 12 in 1

              Price: $8.99

              Durability: High

              Best Place To Buy This Product: Amazon.com

              My Overall Rating: 9.0

              Quick Product Overview:

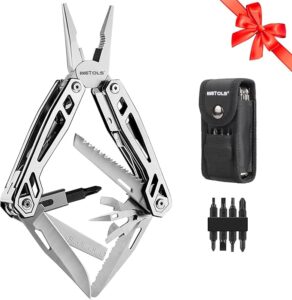
              The Grand Way Multitool has 12 integrated components – spring loaded pliers, wire cutter and wire stripper, folding blade knife, serrated edge knife, bottle opener, metal file, screwdrivers, saw-like blade with wavy chisel teeth, scoring blade. High quality mini multitool. It is the perfect multi-tool for everything – Camping, Hiking, Hunting, Survival, Military, Army and Emergency. A perfect car, bike ,EDC multi tool for men and women. This 12 in 1 tools set is made of high quality 420 stainless steel, handle material is aluminum. Small utility tool has a total length of 4,3″, weight 3,5 Oz. All in 1 tool is a modern lightweight multipurpose tool with unique skeleton design handles which significantly decrease the weight of the utility tool. It comes with a nylon sheath which makes it possible to carry the multitool on. Belt knife. Multitool can also be carried in a pocket, purse or a backpack. Lightweight gear, accessories for EDC. Great for travelers, retired and young men, cyclists, outdoorsy men, military men, fisherman, country boy, gardeners, hunters, campers, marines, working men, hikers.

              Specifications Of This Product:

              Color1. Yellow/Black
              MaterialStainless Steel
              BrandGrand Way
              Item dimensions L x W x H3.94 x 1.38 x 0.79 inches
              Item Weight100 Grams

              What I Like About This Product:

              This Grand Way Mini Multitool Knife 12-in-1 has quickly become my go-to tool for everyday tasks. As I said, even though it is small, it still works and works well.  You can tell the designer thought-out this  combination of tools, to really work. My favorite is the sharp knife, sturdy pliers, screwdriver and bottle opener, just to name a few.

              What I Would Change About This Product:

              Nothing yet

              Final Remarks:

              This Multitool is really made of quality, it is very durable, lightweight, and easy to carry in my pocket, or it can be attached to your keychain, backpack or briefcase. I was impressed by how smoothly the tools open and close without any stiffness or wobbling, which is often an issue with other multitools. If you’re looking for a compact, reliable multitool at a great price, this one might be for you. I  recommend this multitool for anyone who needs a versatile tool whether you are camping, hiking, or just doing things around your house, this Grand Way Multitool does whatever you need done and it is just the right size for your EDC gear.

              If you are interested in this product, click here.  If you are interested in similar products, click on the link below and it will take you to my EDC Multi-tool page, Thanks for reading this product review.

              Go To EDC Multi-tools.

              If you have any questions about this product review or anything else related to Everyday Carry (EDC)/Concealed Carry, feel free to leave a comment below and I will be happy to get back to you.

              Thanks,

              Larry

              Founder of Everyday Carry Essentials

                LEAVE A REPLY

                Your email address will not be published
                Required fields are indicated

                Outside The Waistband (OWB) Holsters Are Becoming More Popular

                There are many types of holsters being produced these days for concealed carry. Inside the waistband (IWB), shoulder holster and outside the waistband (OWB) holsters, to name a few.  For many years OWB holsters has been limited to open carry but things are beginning to change.  

                What Is Open Carry?

                Open carry is the practice of carrying a firearm in public so that it is visible. It is usually carried in some type holster that is fastened to your belt.

                What are the open carry laws:
                • ColoradoOpen carry is legal for people who are at least 18 years old and can legally possess a firearm, except in Denver county and other posted areas. 
                   
                • CaliforniaOpen carry of handguns is prohibited. 
                   
                • ConnecticutOpen carry of handguns is prohibited, effective October 1, 2023. 
                   
                • District of ColumbiaOpen carry of handguns is prohibited. 
                   
                • FloridaOpen carry of handguns is prohibited. 
                   
                • IllinoisOpen carry of handguns is prohibited. 
                   
                • New JerseyOpen carry of handguns is prohibited. 
                   
                • New YorkOpen carry of handguns is prohibited. 

                What Is Concealed Carry?

                Concealed carry is where the firearm is carried in a concealed carry holster and hidden by clothing.
                What are some concealed carry laws:
                • Concealed carry is permitted in all 50 states. 
                   
                • Many states require a permit to carry a loaded, concealed handgun in public. 
                   
                • In Colorado, a resident can only carry concealed in the state using a Colorado Concealed Handgun Permit (CHP). 

                What About A Gun Belt?

                There are many types of gun belts out there that will work great with your handguns. A normal belt that you buy at Walmart or Target will not give you enough support to wear on a daily basis.  A handgun needs a certain amount of support when carrying it all day on your belt. There are gun belts out there that are made of leather and also many special fabrics that are very firm and secure and will go with any wardrobe that you have.  But you need to consider this option very carefully.  If you ignore this choice and try a normal belt with your handgun, you will be very disappointed and probably not enjoy your experience.

                So What About OWB Holsters?

                Since Concealed Carry is becoming more and more popular, many people are challenging the typical boundaries of concealed carry and the typical inside the waistband holster (IWB) that has been worn for so long is being challenged. IWB holsters are just not the most comfortable holsters to wear even though they are very comfortable.  Many gun holster manufacturers are beginning to look at OWB holsters as potential concealed carry holsters and are making them tighter to your hip and therefore more concealable.

                There is not a more comfortable holster out there than a good OWB holster and now that they are making them fit your belt closer, many people are considering using an OWB holster for concealed carry.

                What Do You Need To Make An OWB Holster A Concealed Carry Holster?

                OWB holsters work great for open carry and with a couple minor adjustments to your wardrobe it will turn it into a concealed carry option.  All you need to do is wear a firm belt that is designed to hold a handgun and a good cover garment and you are all set for concealed carry.  There are many gun belt makers these days, just check the Internet and you will be amazed at how many there are. But it is really important to wear a belt that can stand the weight of a firearm.

                Any type of garment that covers the OWB holster from view will work for concealed carry, a coat or jacket, sport coat, vest, untucked shirt, Baggy sweatshirt is all that you need to turn things into concealed carry. Keep in mind that you will need to keep that outer garment on, whether you are inside or outside so it is important to consider your options.

                My advice is to wear a light vest or untucked shirt as your inner garment and then put a jacket or coat over the top.  That way when you come inside you can take the heavier garment off and leave the lighter garments on to cover your handgun.  But you must realize that your cover garment must be long enough to cover the barrel of your handgun, even if you are reaching up to grab something high-up.  As you reeach up your outer garment is pulled up higher and can expose the bottom of your holster. So you must keep that in mind when you are choosing the clothes that you wear when you are wearing a handgun. 

                What OWB Holster Do I Wear?

                Those of you that are familiar with my website should already know the answer to this question. My favorite OWB holster is the Belt Aholster made by the Aholster Company, in Telford, Tennessee, Alan does an excellent job and I really like his holsters. These holsters are made from Kydex and that is my favorite holster material.

                Kydex is an extremely durable acrylic/PVC alloy, created and distributed from the Kleerdex Corporation.  Kydex is extruded in a wide range of colors, patterns, textures, thickness, and grades to optimize long-term performance, appearance, and cost-effectiveness. No other thermoplastic stands up to impact, scratches, and gouging like Kydex. It offers notched Izod Impact resistance to 18 ft. lbs./in. (953 J/m) and is able to withstand various levels of abuse. Due to its high degree of toughness and resilience, Kydex can also be stretched at room temperature to twice its original dimension without breaking.

                The material strength of Kydex allows for greater strength with a fraction of the thickness associated with leather concealment holsters. A thinner holster significantly decreases printing.

                Your holster will fit the same every time.  Whether it is your first draw or your 1000th draw.  This means that there are few; if any, adjustments needed to start carrying your holster and firearm.

                Kydex holsters can be worn in the rain and do not swell or contract due to sweat, humidity, or extreme weather.  In fact, Kydex will help keep the moisture produced by sweating from coming into contact with your firearm because Kydex will not absorb moisture, unlike most conventional holsters.

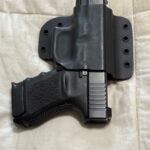
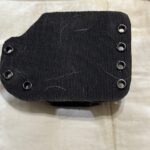
                I like the way these holsters fit your body CLOSE, which makes them a better choice for concealed carry. You can see the way they are shaped that they will attach very close to your body. They snap right on your belt with two rubber straps which holds the holster and gun very securely. And you can also remove this setup quickly and easily when you need to. All you need to do is add a good cover garment and you are all set for concealed carry.  

                Final Comments

                OWB holsters are a very versatile and they are also very comfortable to wear.  As stated earlier, many people wear these as open carry holsters and they are excellent for this style of carry.  But people are beginning to also wear these OWB holsters for concealed carry as well.  Holster manufacturers are making OWB holsters fit very close to the body therefore they can be worn as concealed carry holsters and with the right gun belt and cover garment, concealed carry works great.  My only style of concealed carry has been IWB holsters for many many years but lately I have even crossed the line to OWB holsters.  They are extremely comfortable and with the right gun belt you do not even know you are carrying a handgun. So if you are new to concealed carry or just looking for a different way to carry your handgun, 

                If you have any questions about this post or anything related to Everyday Carry (EDC), feel free to leave a comment below and I will be happy to get back to you.

                All the best,

                Larry

                Founder of EDC Essentials

                  LEAVE A REPLY

                  Your email address will not be published
                  Required fields are indicated

                  GUN BUTTER

                  Product Review

                  Excellent Gun Lubricant

                  Product: Gun Butter

                  Price: $15.63

                  Durability: Very High

                  Best Place To Buy This Product: Amazon.com

                  My Overall Rating: 9.5

                  Quick Product Overview:

                  Gun Butter’s Pen Oiler not only makes your gun more durable, but it also lubricates your gun properly to ensure optimal performance every time you clean it! The all-weather lubricant will not burn up or evaporate in summer’s heat; it functions normally in freezing weather and salt air, stays intact during pouring rain, and repels dust and airborne sand in dry conditions which cause wear and failure. It also inhibits corrosion, preventing the formation of rust. The most advanced lubricant for heavy weaponry, as well as your pistol, handgun, rifle, shotgun or firearm of your choice, Gun Butter Oil is not grease, but a gun lube and cleaner that has enhanced lubricity for extreme temperatures and humidity; its oil will resist change and perform consistently below -20 degrees to over 400 degrees Fahrenheit. Gun Butter’s smoothness and consistency is unmatched due to its ease of function. It is ideal for armed forces, police, and top shooting professionals, this high-performing gun lubricant gives break-in protection and clingability (film strength) to maintain its placement. Gun Butter’s gun lubricant cleans, lubricates, and protects metal from rust, moisture, and dramatically reduces wear during all shooting conditions. Gun Butter provides the maintenance your gun needs so that you can use it for a longer period of time. Gun Butter comes in a small bottle with a very long, steel, needle-like applicator, to accurately put a drop of lubricant right where you want it and prevent over-lubrication or making a mess. Made from synthetic oil, this high quality gun protectant packs power into every drop, you can use fewer drops to get excellent results. The complete high-viscosity oil is designed to clean and preserve your gun. Safe and easy to use, this gun lube packs power in every drop. Gun Butter is for all types of metal-to-metal, metal-to-plastic, and plastic-to-plastic mechanisms. Gun Butter excels when applied to fishing reels, bicycles, motorcycles, doors, locks (car and home) and other precision mechanisms. Ideal for heavy weaponry, rifles, AR’s, shotguns, pistols, handguns, and all firearms, it protects wear parts and bore. Continued performance is assured because Gun Butter’s adhesion exceeds the film-strength of molybdenum grease.

                  Specifications Of This Product:

                  MaterialSynthetic
                  BrandGun Butter
                  Package InformationBottle
                  Liquid Volume0.25 Fluid Ounces

                  What I Like About This Product:

                  The main thing I really like about this product is that it is thick enough so it stays where you place it.  So many other oils will run all over the place so it is hard to keep it in the area that you want.  The other thing is the color of this oil is easily seen on a black gun.

                  What I Would Change About This Product:

                  Nothing

                  Final Remarks:

                  Through the years I have used many different lubricating products on my firearms. Most of them have either been super thin oil that goes everywhere or grease that is a big blob that is hard to not use too much when you use it.  Then came Gun Butter which is somewhere in between and I like it!

                  It comes in two sizes; a 1/4 oz. It says it is a high-performance lubricant designed to minimize friction, improve smoothness, and extend the life of your firearm—and so far it appears to be doing that. The Pen Oiler and a 2/3 oz. bottle, both have a needle-point applicator which works great when applying the product, it is easy to get the oil exactly where you need it, without making a mess. A few drops go a long way, and the lubricant spreads easily. As soon as I applied it to handguns, I noticed an immediate difference. It tends to smooth things out right away. This stuff is really awesome and I may have finally found my #1 gun lubricant.  I highly recommend it, you should try it.

                  If you are interested in this product, click here.  Thanks for reading this product review.

                  If you have any questions about this product review or anything else related to Everyday Carry (EDC)/Concealed Carry, feel free to leave a comment below and I will be happy to get back to you.

                  Thanks,

                  Larry

                  Founder of Everyday Carry Essentials

                    LEAVE A REPLY

                    Your email address will not be published
                    Required fields are indicated

                    OLIGHT O’PEN MINI 2 BALLPOINT PEN

                    Product Review

                    I just reviewed a tactical pen by Takeflight which was pretty cool. But for those of you that are not into tactical gear, this ballpoint pen might suit your needs a little better.

                    Very Cool Writing Pen

                    Product: Olight O’Pen 2 Ballpoint Pen

                    Price: $12.99

                    Durability: Very High

                    Best Place To Buy This Product: Amazon.com

                    My Overall Rating: 9.0

                    Quick Product Overview:

                    The Olight O’Pen 2 ballpoint pen and pencil tip are 2-in-1, and feature the reverse s-shaped bolt-action mechanism for easy switching of functions. The 0.7mm O-refill ensures smooth without skipping or blotting, consistent performance with a writing length of 2000 feet. The mini pen with compact length is only 4.13 inches, small and hidden, easy to carry. Just clip this mini pen to your notebook, pocket, or backpack strap and it’s always ready to use. The aluminum alloy pen body with the skeletonized barrel for comfortable holding and reduced hand fatigue.

                    Specifications Of This Product:

                    Ink ColorBlack
                    Height4.13 in / 105 mm
                    Diameter0.39 in / 9.8 mm
                    Body MaterialAluminum Alloy
                    Weight                            0.56 oz / 15.8 g
                    Drop Test                            7.49 ft / 0.8 m
                    Bolt Type                            S-Shaped Bolt Action
                    Package Included

                                                O’Pen Mini 2 (Includes Refill &   

                                                Pencil Tip) x 1; Pencil Tip x 2

                    What I Like About This Product:

                    I have been looking for a quality EDC pen that’s neat and writes well, and that’s not always easy to find these days. The Olight O’Pen Mini 2 can do both. It is a smaller pen than I expected, but actually is very workable. It writes very smoothly and seems very durable, the weight is really nice for it’s size.

                    What I Would Change About This Product:

                    I have only used this pen for a short time but it is all I need right now.

                    Final Remarks:

                    I like this tactical looking pen that is really not tactical.  It has both pen and pencil which can really come in handy, plus it is very compact.  I also really like the fact that it is made of aluminum, which is pretty cool in my book. It’s smaller size took a little getting used to but now I really like it.  If you need a really nice pen that writes great, check this one out.

                    If you are interested in this product, click here.  Thanks for reading this product review.

                    If you have any questions about this product review or anything else related to Everyday Carry (EDC)/Concealed Carry, feel free to leave a comment below and I will be happy to get back to you.

                    Thanks,

                    Larry

                    Founder of Everyday Carry Essentials

                      LEAVE A REPLY

                      Your email address will not be published
                      Required fields are indicated