This is a very controversial subject and there are many points of view, some people feel it very important and others think that it is a complete waste of time. You can contact most of the gun manufacturers and they will not even mention anything about “Break-in Procedures”. So, what do you think? Is it important or not? Maybe my comments will help you decide, Let’s talk about it.
Is Breaking In A New Handgun Or Rifle Important?
Well I have done a lot of research about this subject and here is what I think: If I purchase a new handgun or rifle, I want it to operate to the best of its ability. If I am spending my hard-earned money on a firearm then you can bet I will do whatever it takes to make it operate at its best. If by chance going through certain break-in procedures will give my handgun or rifle a better chance to operate well, I am not going to ignore those really good procedures that might make it operate better just because some people say it is a waste of time. I will admit, some people do go way overboard in their break-in procedures so I have combined some procedures which make sense to me and have come up with what I think will work well as break-in procedures and I thought they might be of interest to you.
What Supplies Are Necessary To Carry Out A Break In Procedure?
- A Good Rifle Cleaning Rod
- A Good Handgun Cleaning Rod
- An OTIS Gun Cleaning Kit for handguns and rifles
- Hoppes #9 Solvent
- Non-Ammonia-based Solvent
- Break-free CLP
- Cleaning patches
- Kroil Oil
My Handgun Break-In Procedures
The first thing to do after you purchase a new handgun is read your handgun manual, you will get a lot of great insight about your new handgun. Even if you have other handguns, you need to know that handgun inside and out. Next, make certain that your handgun is unloaded: remove the magazine, work your action 5 or 6 times to make certain there are no bullets in your gun. Now place you finger in the chamber to verify that it is unloaded.
Next step – you need to examine your handgun, check things over to see if there are any visible problems or concerns before you shoot it and so you will be able to tell if things change after you shoot it. First, field-strip your handgun and remove all oil and grease on the inside and outside of your handgun using Hoppes #9 and a brush and cloth. Make sure that you remove excessive lube, Some of the lube is there as a preservative, but in some cases, some of it is there to facilitate break in and you don’t necessarily want to strip it all off.
When this is done, reassemble your handgun and generously lube as directed by your gun manual. (Drop of oil on each side rail, drop of oil on the barrel hood, drop of oil on the outside of the barrel and spread around, then rack the slide several times). Wipe down the whole exterior of the handgun. Now its time for the range,
Get your favorite bullets (usually FMJ), they recommend shooting at least 200 rounds through your handgun before it is broken-in. I like to shoot my 200 rounds in smaller groups: 25, 25, 50, 50, and 50. I clean my handgun using an Otis cable system in between each of those groups when I am breaking in my handgun so I will get rid of any fouling that’s in the barrel. Remember, during this break-in procedure a handgun might have some hiccups, or malfunctions when you are first shooting it. So be prepared for that and just work through them and see if they go away after a few more bullets have been fired through it.
Once your 200 rounds have been shot, take your handgun home and repeat the field stripping and gun cleaning, as described above. Check for excessive wear, see if anything changed, and then reapply lube where applicable based on the manufacturer’s guidance and based on where you see wear and reassembly your handgun. Next time at the range I wouldn’t expect to see any malfunctions.
FMJ bullets is a great bullet to use as practice ammo. They usually feed very reliable and are more economical to shoot. Once your handgun has completed the break-in procedures, make sure to also shoot your self defense bullets through your handgun, you need to make sure that they cycle through your handgun consistently and make sure you can shoot them well before you use them in a situation to protect your life.
My Centerfire Rifle Break-In Procedures
As with your handgun, the first thing to do is read through your rifle manual so you learn all about it. Before you do anything with your rifle you must check to see that it is completely unloaded. If you have a magazine – remove it. Then work your action 5 or 6 times to eject any bullets that might be in your gun. Then visually check the chamber and magazine area for any bullets and then place your finger in there to verify that it is clear.
Now you can examine your rifle completely for any issues, problems, or blockage, then examine your rifle to make certain that it is unloaded. Then disassemble your rifle placing all your small parts in a container (so they don’t get lost), and the large parts can be placed in order on your gun cleaning mat. Then clean each piece (large and small parts) to remove any grease or oil left behind by the manufacturer and place them back on the mat or container for reassembly.
My next step is to scrub the barrel, wrap a slightly undersize bore brush with a patch, wet the patch with a non-ammonia-based solvent, and scrub that barrel, from breech to muzzle, then remove brush from rod and remove the rod from barrel, put brush back on rod and then do that 15 or 20 passes. (Do not go back and forth in the barrel, only one direction from breech to muzzle).
Next, switch to a proper-fitting jag and clean the barrel with patches dampened with Hoppes #9 solvent, and push them through the bore, breech to muzzle, let the solvent sit in the bore for a few minutes and then switch to dry patches and clean again until they come out clean.
Once this procedure is completed, it is time to reassemble your rifle and add lubricant as suggested by your owners manual. During the break-in procedures I add a bit more lubrication to my rifles while things are initially working together as there is more friction going on until the rough edges get a bit smoother. Make certain to wipe the exterior of your rifle down very well before proceeded to the next step. Now its time to shoot your rifle:
The shooting portion of this break-in procedures is made up of a series of shooting and cleaning after a certain number of bullets have been fired. This helps minimize any buildup of gun powder residues to keep the barrel clean: First shoot 1 single shot, and clean the barrel using an Otis cable system until it is clean, then apply a thin layer of Kroil oil, It’s a penetrating oil that’s proven exceptionally good for seasoning the inside of rifle barrels. This helps prevent the fouling from sticking. Also begin to zero your rifle as you shoot these first 5 shots so you should be dead on target. Then shoot 4 more single shots and clean the barrel after every shot, and also apply Kroil oil as before. Once those first five shots have been fired and cleaned, then begin to shoot 3 groups of 5 bullets and clean after every 5-shot group. Also apply the Kroil oil as before. Once these last three 5-shot groups have been shot and cleaned, your break-in period is complete. Take your rifle home and clean it completely so you are ready for more shooting.
Bullet selection is up to you and your pocket book for use. If you choose to use jacketed bullets then break in with jacketed bullets. This break-in procedure takes 20 shots, once complete, you are ready for normal shooting.
But no matter how many bullets you shoot from here on out always, always, always clean your rifle after every shooting session. Then lube, all moving parts, wipe down your gun with rag that containing Break Free on it, or use the Otis wipes, this includes your stock and other parts, etc. Finally, run a patch through the bore with Break Free on it and put it away in storage.
My Rimfire Rifle Break-in Procedures
Again, always begin with reading your rifle manual to learn everything about that rifle. The first thing to do is make certain that your rifle is unloaded, if you have a magazine – remove it. Then work your action 5 or 6 times to eject any bullets that might be in your gun. Then visually check the chamber and magazine area for any bullets and then place your finger in there to verify that it is clear. Now check the entire rifle for problems then, disassemble your rifle placing all your parts in a container so they don’t get lost and clean each piece inside and out to remove any grease or oil left behind by the manufacturer. Pay special attention to the bolt, breech face, action, chamber, throat & crown may need slightly more attention.
Next step is to pre-Scrub your barrel, wrap a slightly undersize bore brush with a patch, wet the patch with a non-ammonia-based solvent, and scrub that barrel, from breech to muzzle, then remove brush from rod and remove the rod from barrel, put brush back on rod and then do that 10 to 15 passes. (Do not go back and forth in the barrel, only one direction from breech to muzzle). Next we scrub your barrel: Switch to a proper-fitting jag and clean the barrel with patches dampened with Hoppes #9 solvent, and push them through the bore, breech to muzzle, let the solvent sit in the bore for a few minutes and then switch to dry patches until they come out clean. Once this procedure is completed, it is time to reassemble your rifle and add lubricant as suggested by your owners manual, lastly, wipe down the entire exterior of the rifle to make sure it is clean.
Now its time to shoot your rifle, get your favorite 22 long rifle ammo, load your magazine and begin shooting your rifle: 10 round group, 20-round group, 20-round group, 50-round group and a final 50-round group. Run an Otis cable cleaning system through your barrel after each 10, 20, 20, 50, and 50 round groups using a brush with Hoppes #9 solvent (let it set for a few minutes) then run clean patches through the barrel until they’re clean and then go to the next group of shooting. As you are shooting your first groups you also need to zero your sights, that way you will be dead-on target before you complete your break-in period. When you have gone through 150 bullets your break-in period is complete for rimfire rifles. Now it is time to clean your rifle completely using Hoppes #9 solvent, Break Free CLP and Gun Butter for a final lube then either put it away for storage or go out and shoot some more.
Final Comments
As I said, I spent a lot of time doing research about this subject, mixing and adjusting information to come up with what I think is a pretty good set of procedures for breaking-in your firearm. I would be very interested in hearing what you think about these procedures. Do you like them? Hate them? Think they are a joke? So far they have worked very well for me and so I will continue using these procedures. I would really enjoy your feedback. Thanks for reading this article.
If you have any questions about this post or anything related to Everyday Carry (EDC), feel free to leave a comment below and I will be happy to get back to you.
All the best,
Larry
Founder of Everyday Carry Essentials
 offer advantages in bright to moderate lighting conditions by providing a clear, bright, and easily visible aiming point, potentially aiding in faster target acquisition and shooting. However, they rely on ambient light, making them less effective in total darkness compared to night sights that glow with tritium.
 from acquiring the dot. However they also offer no benefit. When it’s dark enough to need the night sights your dot will be way brighter. Then when using any white light to identify a target the night sights will wash out and not be able to be seen.
  a radioactive isotope of hydrogen, which emits beta radiation that excites phosphor material, causing it to glow
 The methods are the same but the paint options are different. I use a good quality spray paint to paint my sights but there are other options, model paint or fingernail polish works too. I like the way spray paint flows on your serrations, model paint or fingernail polish is very thick to work with. A very easy option is to use
  to mask around the area that you will be painting. I would rather take some extra time up front to mask the area good so the paint will go where I want it to go rather than drip paint on the side of the sight and then
 have to scrape the paint off after it is dry. I like to cut the tape in strips and place them around the area to be painted, it is easier that way. (It is very important to make sure the edges of your tape are pressed well.
 debris and then spray the paint inn the cup so you have a nice amount of paint to use.
 place the sight as flat as possible so the paint does not run some place that you do not want it to.

 there that will work great with your handguns.
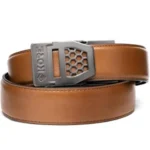
  will go with any wardrobe that you have. But you need to consider this option very carefully. If you ignore this choice and try a normal belt with your handgun, you will be very disappointed and probably not enjoy your experience.
 that has been worn for so long is being challenged. IWB holsters are just not the most comfortable holsters to wear even though they are very comfortable. Many gun holster manufacturers are beginning to look at OWB holsters as potential concealed carry holsters and are making them tighter to your hip and therefore more concealable.
 open carry and with a couple minor adjustments to your wardrobe it will turn it into a concealed carry option. All you need to do is wear a firm belt that is designed to hold a handgun and a good cover garment and you are all set for concealed carry. There are many gun belt makers these days, just check the Internet and you will be amazed at how many there are. But it is really important to wear a belt that can stand the weight of a firearm.
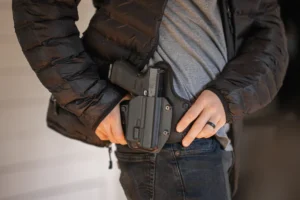 the OWB holster from view will work for concealed carry, a coat or jacket, sport coat, vest, untucked shirt, Baggy sweatshirt is all that you need to turn things into concealed carry. Keep in mind that you will need to keep that outer garment on, whether you are inside or outside so it is important to consider your options.
 heavier garment off and leave the lighter garments on to cover your handgun. But you must realize that your cover garment must be long enough to cover the barrel of your handgun, even if you are reaching up to grab something high-up. As you reeach up your outer garment is pulled up higher and can expose the bottom of your holster. So you must keep that in mind when you are choosing the clothes that you wear when you are wearing a handgun.
 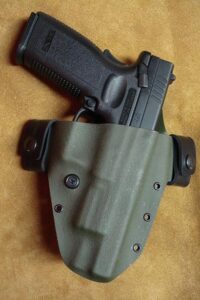 Aholster Company, in Telford, Tennessee, Alan does an excellent job and I really like his holsters. These holsters are made from Kydex and that is my favorite holster material.
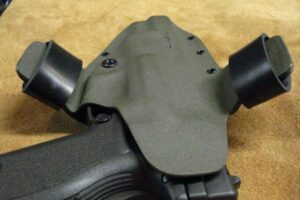 Due to its high degree of toughness and resilience, Kydex can also be stretched at room temperature to twice its original dimension without breaking.
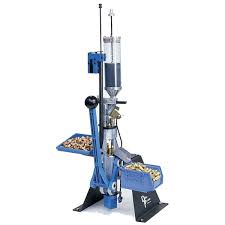 It was also about 20 years ago and prices of ammo were a lot cheaper then they are right now. Then came COVID and ammo prices went through the roof and they really have not come back down to reasonable prices yet! So what do we do now? Pay the high prices or do we think about reloading? Luckily, I still have all my reloading equipment and most of it is useable today.
  It is not a big fancy progressive press, like the blue Dillon press in the upper picture, that will turn out lots of bullets in a short period of time. It is just a single stage press, Rock Chucker made by RCBS, thats in the bottom picture, but it will work for either handgun or rifle ammo and that’s what I need. Lets look a bit closer at this topic and let you make a decision.
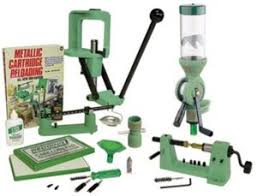 bullets it is necessary to get certain equipment:

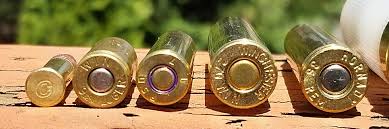 , any centerfire bullets can be reloaded, but rimfire cartridges cannot. A centerfire cartridge is a type of ammunition that has a primer in the middle
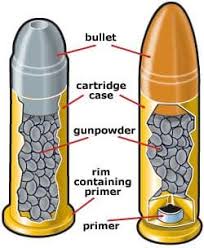 of the base of the cartridge casing. Centerfire cartridges are used in handgun, shotgun and rifles.
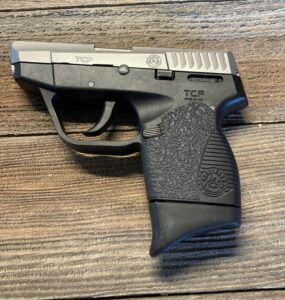 It was a Taurus TCP, .380 ACP, two-tone beauti and I thought I found a great deal (see the photo at the right). I made an impulse buy! Not a good idea when you are talking about a handgun! I was an experienced shooter, I had already purchased quite a few firearms and I never thought I would buy on emotion. I did not look into the facts, the reviews, etc. I just bought a cute little gun. So to make a long story short it was not the best gun for me. In the rest of this article we will talk about many things about pocket pistols and then wrap things up with my final choice on the pocket pistol that I finally went with.
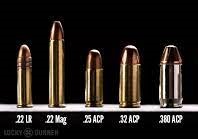 Using a handgun with these smaller calibers is better then having no handgun at all, but you need to look at each caliber from a self defense perspective before you place your life on the lines with one of these smaller calibers.
  . If you look at the picture to the right you will see what I mean. With a shorter case, you have less powder in the bullet and therefore less power in that cartridge. While the 9mm has much more power behind it, these pistols are also larger and may be less concealable.
 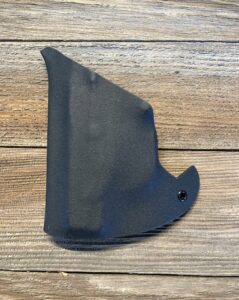 that covers most of the gun, including your trigger guard. When you carry a pistol in your pocket you need to make sure nothing else is in your pocket so to get in your way of the gun. This holster covers the shape of the gun so it will not “print”. This means other people cannot see that you have a gun in your pocket because they cannot see the shape of your gun. When you carry this way you need to make sure your pants are not too tight and that your pocket has enough room for your gun and holster. If you look at the holster it has a point on the top end and a hook on the bottom end of the holster. This aids in stripping the holster from your pocket as the weapon is drawn from your pocket.
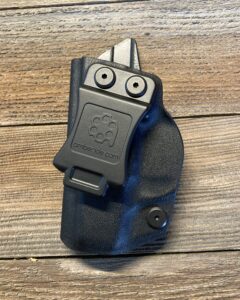 . It needs to fit your handgun and securely clip on to your belt. The holster must cover your trigger guard and keep the handgun in the holster until you are ready to draw it. There is a retention screw on the back end of the holster where you can tighten the holster so the weapon will not fall out. This is a holster that I found on Amazon but it is a pretty good holster for the money.
 . This little handgun has great reviews and many people feel this is the best pocket pistol on the market. This is a .380 ACP caliber and it holds 10 rounds in the magazine. They also have a 12 round magazine but I do not like the base plate on that magazine. I added a Pearce grip extension and it gives me a better grip on the pistol. it fits my fingers better and gives me better control of the pistol. The Taurus TCP only held 6 bullets in the magazine so the Ruger almost doubles the capacity and that’s a good thing. More capacity in a similar size package. This
 , what a nice little holster that can be slipped in your front pocket. As I said before, it almost disappears in your pocket. It is an excellent combination for this pocket pistol to be concealed. Once this is in your pocket you can have your hand on the grip and it cannot be observed until you pull the pistol out of your pocket and put it into action. Very slick and concealed. These pocket holster by Aholster work great and they will hook on the front of the holster when pulling it out of your pocket or catch on the bottom hook as pressure is applied on the bottom of the holster.
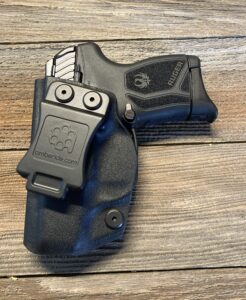 . It is such a small package that it melts into your waistband and you hardly know that it is there. But keep in mind that even though it is small you still need to use a cover garment when carrying this pistol in a IWB holster. That’s why I like the pocket holster better for such a small gun. As a rule If I am going to carry a gun in my waste band I would rather have a larger caliber, with a longer barrel that I shoot better. That being said there are times in the hot summer time where this small Ruger works best in my waist band.
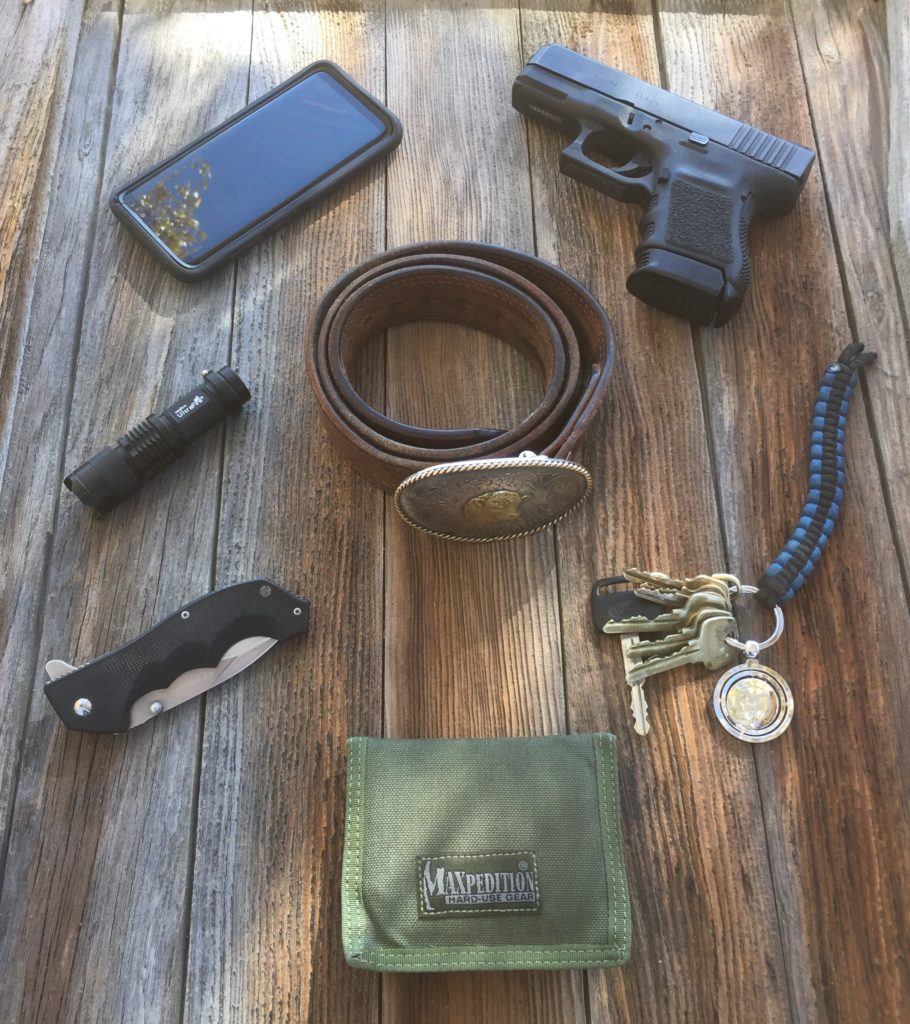
 ? Or is it just a few Concealed Carry Handgun Permit holders that choose to not carry their weapon? Why would you jump through all the hoops necessary to get your Concealed Carry Handgun Permit and then not use it? I have done some research about this topic, is it true? Let’s explore this topic!
 Ruger Redhawk .44 Mag 4″ barrel (picture at the upper right) ever since about 2019 and then you could find them for about $900, if you looked around. Now they are $1200 to $1300, and that is more then I can justify. This revolver is a real beauty and has some nice style about it. A .44 Mag is one heck of a cartridge, its a great trail gun but can also work for self defense. One nice thing about .44 Mag is you can also shoot .44 Special and that is much easier to shoot. There is something about a revolver that always looks pretty cool, but that being said it is not worth $1300.00 in my book. As much as I like this handgun, it will not have a place in my gun cabinet.
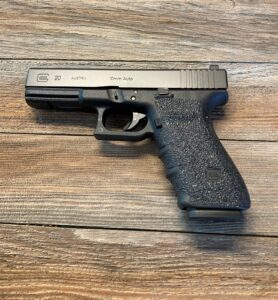 (picture lower right), Its not as pretty of a weapon as the Ruger but it is fancy enough for me. I am a “Glock Guy” and I really like these handguns, they fit my hand really well and are the most reliable guns that I own. So I am not too disappointed that this will be my trail gun instead of that fancy Redhawk .44 magnum. A 10 mm is also a great cartridge and works very well for a trail gun. Is it as powerful as the .44 Mag – Absolutely not but it also has 15 rounds available instead of only 6 in the revolver so that’s some firepower. I
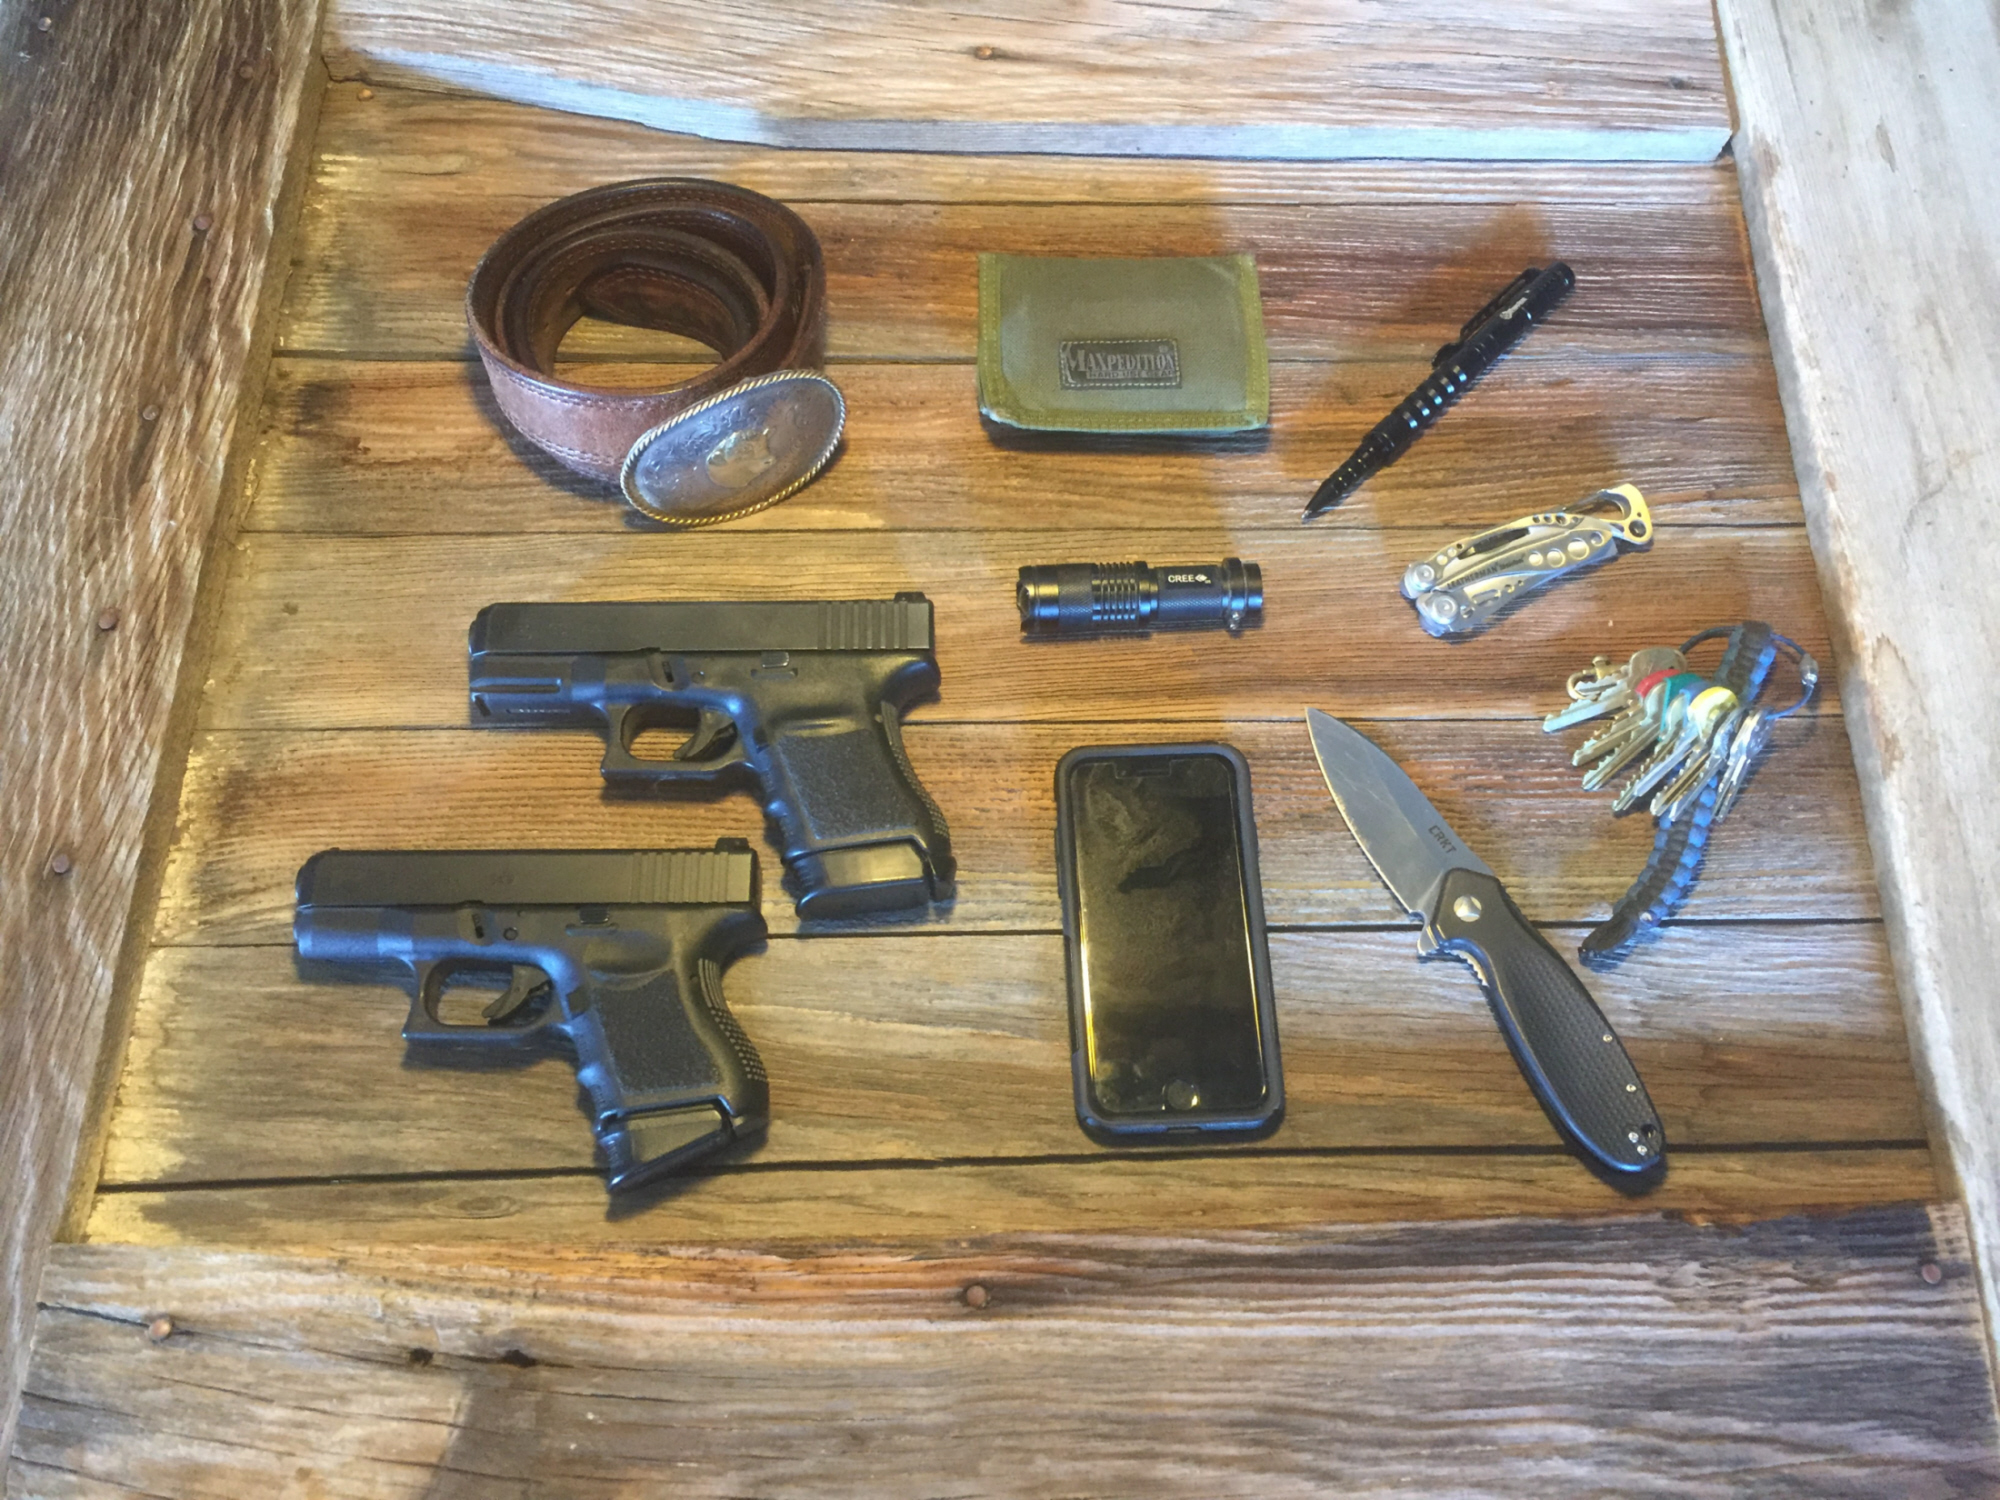
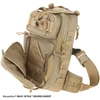
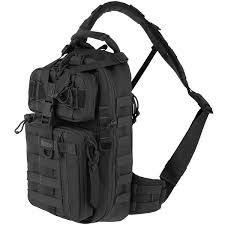 and how much I liked this pack. Well I am still using it on a daily basis and it will not be replaced any time soon. For me it is the perfect size and holds the right amount of gear. I tend to carry too much gear because my pack will hold it, this pack limits what I can carry and that works best for me. There are many pockets to organize your gear and that is what I am looking for. I really like the fact that it holds a water bottle, it saves me clipping one on a strap somewhere. There are a lot of packs these days that do not hold a water bottle and that seems to frustrate me. The other thing that is a necessity for me is it has a concealed carry pocket. As much as I like to carry my handgun in a belt holster, my job will not allow me to carry concealed at work so I can keep a handgun in this pack and both of us are satisfied. If you are looking for a great little pack you might check this out.
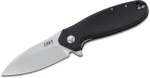 folder, a really sweet knife. But being out on the farm, I probably cut some baling twine and left it stuck in a hay bale somewhere. Well I always need a knife but I did not want to spend a bunch of money so I went to Amazon and looked for something reasonable. That’s when I saw the Eafengrow EF911 Folding Knife
 , for the money it is a really great knife. It is not as smooth as the CRKT but it does work well. The price was $24.99 and works great for an EDC folding knife. The blade shape is not traditional but it turns out to be very functional. It was very sharp right out of the box and with a touch-up on my ceramic knife stone it was extremely sharp. The belt clip works very well, it holds this knife right where I want it in my pocket. I also wrote a review on this knife too back in December 2023 and that got my attention about this folding knife in early 2024.
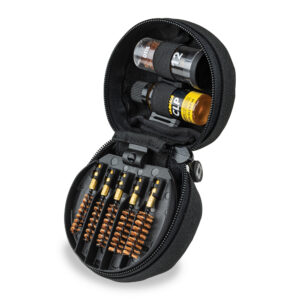 and it has revolutionized the way I clean my guns. I wrote a review on
 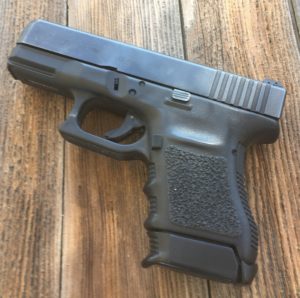 . I have used it for many years and it is the handgun I am most comfortable with. Since it is considered a sub compact handgun, it has a 10-round, doubled stacked magazine that feeds the .45 ACP bullets very reliably. Compared to other concealed handguns it is a bit thick and heavier but I still like it.
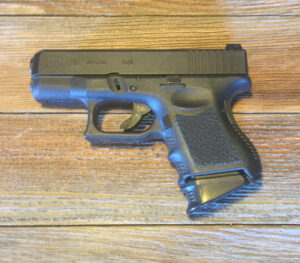 , it is a smaller package and prints less with hot-weather clothing. So let me describe my warm-weather clothing, it is a pair of jeans and a tucked-in tee shirt with an untucked short-sleeved shirt as a cover garment. While the Glock 26 is small it still needs something to cover my IWB holster. It too has a 10-round, double stacked magazine for the 9mm bullets and that helps its concealability. But ever since I picked up the Glock 15 I am beginning the reconsider if it is the best handgun to use.
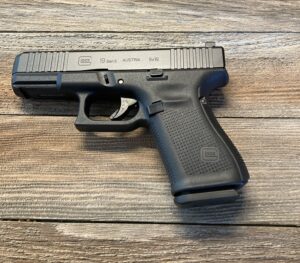 and while it is smaller than the Glock 30 it has a 15-round magazines which works out great is an adequate amount of firepower for a concealed carry firearm.. As I am getting older, smaller handguns feel better in my IWB holsters so this Glock 19 is beginning to seem like a better option for me these days. I replaced the stock plastic sights with XS Sights F8 night sights and they are really nice. They installed very easy and are very accurate. The Glock 19 holds 5 more rounds then the G26 and has a slightly longer barrel, that being said this makes the G19 a bit more accurate and has more firepower. This handgun still conceals very well so that is making me reconsider my gun of choice.
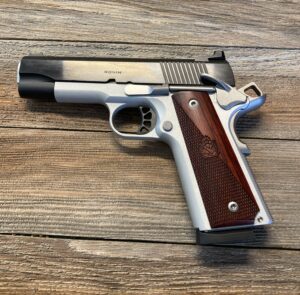 and is new to me, I do not carry it very much right now. I have a few more rounds to shoot through it until it is completely broken-in, but so far it’s working great. But I love the gun and it carries very well in my IWB holster. I ordered a leather OWB holster from Hunter and I am waiting for that to get here. Now because these handguns are single action, they need to be carried “cocked and locked” and that brings up a whole bunch of other safety concerns. Will I address them in this article, probably not! Will I address them in another article, possibly! But if I cut to the chase right now and say when I have this pistol broke-in and I feel it is reliable, I will carry it “cocked and locked”!
 and is a pocket pistol, this is also my warm weather concealed carry handgun. So the question comes up, if I have a Glock 26 that I just said was for warm weather then why would I want another one? Well in Colorado we have some fairly hot weather in the Summer and those days I cannot tolerate a cover garment as I sweat very badly. Therefore, thats why I have the MAX. With the right kinds of pants this little gun can be placed in a pocket holster and slipped in your pocket completely un-noticed. Some people might just not carry a pistol on those days when it is uncomfortable. But I would rather have a smaller handgun that can be carried during uncomfortable times and therefore be armed all the time. If you are interested in Pocket Pistols, look for my next article, “My Little Pocket Pistol”, It will have more details about these small guns.
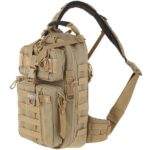 Product Dimensions Diagram
 horizontal slip pocket
 CCW
CCW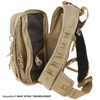 webbing
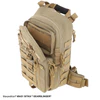 mesh pocket
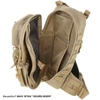 slip pocket