Product Review
One Of The Best OWB Holsters
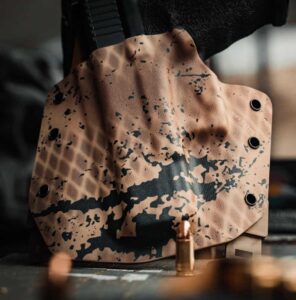
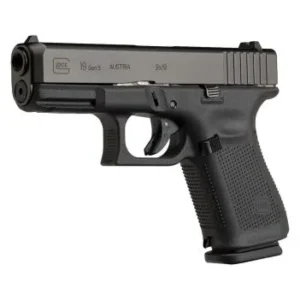
Product: Gunfighters, Inc Ronin OWB Holster
Price: $79.00
Durability: Very High
Best Place To Buy This Product: gunfightersinc.com
My Overall Rating: 9.5
Quick Product Overview:
The Ronin is the foundation of the GunfightersINC holster lineup. The Ronin embodies Gunfighters’ core principles of simplicity, ergonomics, and durability in every way possible.
Our base material is premium USA-made .08 thickness Kydex which is hand-formed against the firearm of choice resulting in unsurpassed retention characteristics, a smooth draw, and long-term durability.
Every line on the holster enhances comfort, functionality, or aesthetics so that it not only feels like an extension of your body but looks like one too. Belt loops are hard riveted to the holster and then painstakingly hand contoured for maximum comfort and a perfect offset. No two belt loops are the same, and no threaded fasteners are used in anything we build, so there is nothing to come loose and fall out.
Marine-grade friction tape is then applied to the inside of each loop to ensure maximum stability. The result is a single, indestructible piece of equipment you can bet your life on… we do.
We’re so confident in our gear that we back it up with an unconditional lifetime guarantee. Whatever happens, we have your back.
The Ronin OWB, “Outside the Waistband,” is worn outside the pants’ waistband and typically attaches to a belt. An OWB holster is popular for its accessibility and easy, smooth draw.
The Ronin OWB Holster
- Designed for everyday carry and range usage.
- 12 degree forward cant aids concealment and reduces printing.
- Hand-formed Kydex no-slip belt loops.
- High cut for excellent retention.
- Handcrafted in the USA and shipped directly from Manufacturer.
Specifications Of This Product:
- Our base material is premium USA-made .08 thickness Kydex
- 12 degree forward cant aids concealment and reduces printing.
- Handcrafted in the USA and shipped directly from Manufacturer.
- Marine-grade friction tape is then applied to the inside of each loop to ensure maximum stability.
What I Like About This Product:
There are two major things that I like about this holster: 1) Retention, and 2) Comfort. As I have mentioned before I have three of their holsters already and this one makes four. The fit and finish of Gunfighters, Inc holsters is always excellent but their retention is very meticulously done and it shows. They use rivets instead of screws so their retention does not waiver. I for one applaud them! I always want to make certain my handguns stay in my holster until I am ready to draw my weapon. Some people however, would like a way to adjust the retention and that becomes a little more difficult. On all my Kydex holsters, I want to hear that “click” which lets me know my handgun is in place. That happens with each of their holsters, so they are doing it right! Then there is the comfort factor, This is a very comfortable holster which you would expect from an OWB holster. But the way that they form it to your hip makes it extremely concealable and it works great that way. Plus they place some anti-slip tape on the belt loop so that it does not move around.
What I Would Change About This Product:
Nothing
Final Remarks:
The Gunfighters, Inc. is really a top notch Kydex holster company, the Ronin OWB Holster really is a great holsters. Their turn around time is about average for a custom holster shop, but the end result is worth waiting for. I am a black colored holster guy but they have many colors and patterns to choose from, The quality is excellent, fit and retention is superb and their selections coveres all the bases. Check out their website, https://gunfighteresinc.com to find out all that is available to you, you will be glad that you did.
If you are interested in this product, click here. If you are interested in similar products, click on the link below and it will take you to my EDC Concealed Carry Holster page, Thanks for reading this product review.
Go To EDC Concealed Carry Holsters.
If you have any questions about this product review or anything else related to Everyday Carry (EDC)/Concealed Carry, feel free to leave a comment below and I will be happy to get back to you.
Thanks,
Larry
Founder of Everyday Carry Essentials
 and came to the conclusion that the grip on that handgun was not very comfortable. The texture on the grip is very grippy but not what I like on my handgun grips. Even though a 9mm does not kick very bad, I still like a rubber grip on my handguns so the stock grips are not exactly what I want for my EDC handgun. So lets talk about the possibilities.
 stipple my handgun grip is kind of a costly project, not to mention it usually takes 2 to 5 weeks before you get them back. Is it nice? For sure it is! Does it look cool -Yes! But I do not want to pay an extra $100 to $500 just to texture my grips.
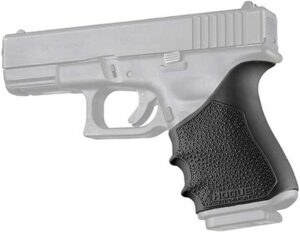 Grip Sleeve for my Glock ia another possibility. The cost is around $16 from Amazon, which is not a bad price.
 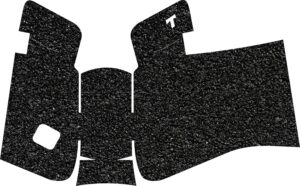 , I have one of these on my Glock 20 and it really works great. They are very easy to install and they seem to last a long time. You can get them in textured rubber or a sand paper finish. The rubber texture is the one is the one that I like and the cost from Amazon is $19.99.
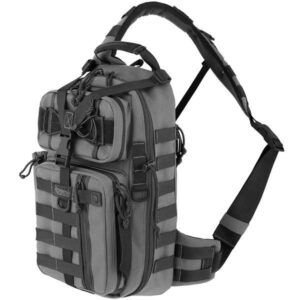
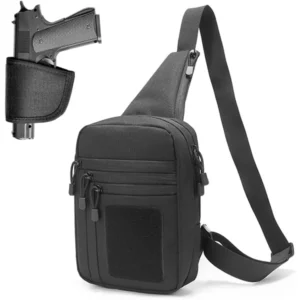 and all I wear is a t-shirt and a pair of Wranglers, I do wear a small sling pack (or bag) to carry my handgun in. Recently I bought a Raptor Sling Pack which seems to work very well. I did a review on this bag on September 30, 2025, if you are interested in that. This bag is smaller than a full backpack and works great as a concealed carry bag. If this pack is something that might appeal to you, then check it out. The holsters that come with both of these backpacks are not very good in my opinion and so let’s explore this topic a little further.
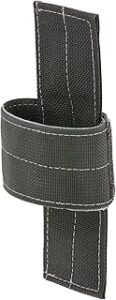 are made by Maxpedition and Dinosaurized: An Army Store and they have a couple of styles of backpack holsters that they offer for their concealed carry backpacks. They are the Velcro straps that can be placed around your handgun to universally fit many sizes of handguns. The back of the universal handgun holster has Velcro on it so it can be placed anywhere the backpack has Velcro attached to the backpack. There are other brands of concealed carry backpacks; Vertx, Blackhawk, 5.11, Glock, Alpine Concealed, Voodoo, Eberlestock, Red Rock, Elite Survival Systems, Wolf Tactical, Viktos, Advance Warrior Solutions, etc. which use the same type of holster for their backpacks. Some of them are included with their backpack and others you need to purchase separately.
 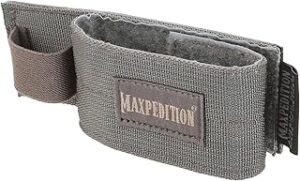 Some people like this style of Velcro backpack holster, they are handy, versatile and economical but it is not what I like to use in my backpack.
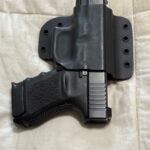 that I never heard of before. Their name was Cook’s Holsters and they really did a fine job with these holsters. I have ordered two of their holsters about 6 – 7 years ago and they really impressed me. These are especially made to fit flat, like in a backpack and that flat section of the holster is large enough
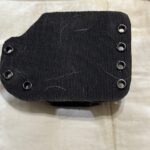 to hold a large piece of Velcro that will really sticks to the side of a backpack. Plus it clicks in place and will not come out without a good tug on the handgun by your hand. They worked really awesome for me and I liked them a lot. Then when I got the Raptor Sling Bag I tried to contact them but then they were gone. Their website is still there but I got not response by phone or email. And I thought I would just need to forget about these holsters and utilize something else.
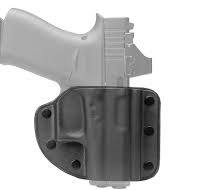 again, but all I found were the Cordura styles and nothing made out of Kydex. Then I tried to look up flat-backed Kydex holster and I found what I needed. A company named Crossbreed Holsters ( ) had a whole line of flat backed holsters for purses, backpacks and bedside holsters. They call their holster a “Modular” holsters, and they do make them either right or left handed. So if you are interested in this type of holster, you might check them out.
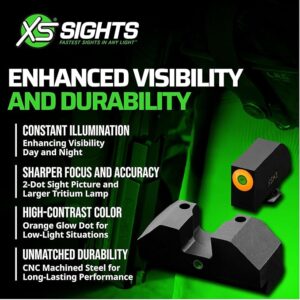 as I feel they have very high quality sights at a somewhat reasonable price. I was looking on Amazon a while back and found a new style of XS Night Sights that I thought might just work for me and besides they were at a very reasonable introductory price. So I thought I would give them a try. I bought three for my Glocks, my Glock 19, 30 and 20. Most of my discussion will be about my Glock 19 (9mm), so let’s talk about it.
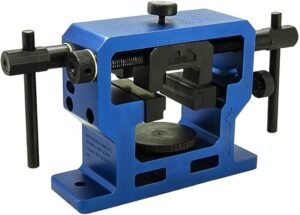 works with many types of semi-auto slides: full, compact, subcompact, and pocket-sized semi-auto pistols. The base platform is adjustable for height, to get your slide and rear sights at the proper height for the rear sight pusher. Includes one bottom spacer for some pocket pistol slides for proper height alignment. The multiple vertical and horizontal clamps secure various sizes and types of semi-auto slides in the tool. The adjustable top brace with a plastic insert to secure the slide’s vertical placement on the base platform. The adjustable side braces with plastic inserts secure the slide’s horizontal placement on the base platform. Includes two sets of side plastic inserts: a pair of flat inserts and a pair of stepped inserts to fit a wide variety of slide profiles.
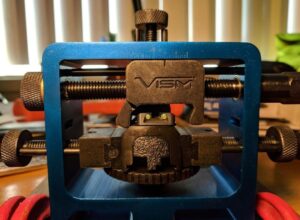 so that you only have your slide (barrel and spring removed).
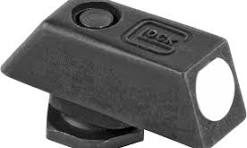 the screw is on the inside of the slide.
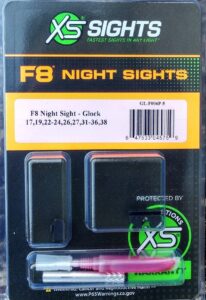 from the packaging and see what you have to work with.
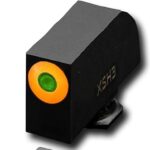 and put a small amount of Loctite on the screw.
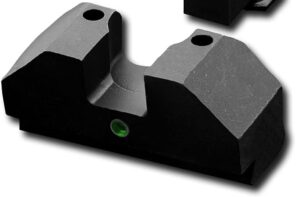 and slide it to the right into the dovetail. It should slide into the dovetail 1/4 to 1/3 of the way into the dovetail, or further fitting will be required.
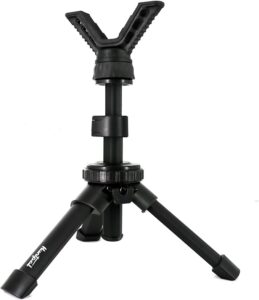 for support (see photo below), a rest like this works for handguns or rifles and helps to remove most of the other movements so you can see exactly where your handgun is shooting.
 do the job. So then why not buy one? I guess you could say I am kind of a tight-wad and a bit of an engineer-type and if I can make one just as good (or better) then why not do it. Besides I don’t know about you but I get a lot of personal satisfaction from doing things myself, rather than just buying one.